
The introduction describes a situation where Italian troops are losing control of a town in Ethiopia to colonial troops that have mutinied. The Italians then ask the nearby advancing South African commonwealth troops for help in restoring order.
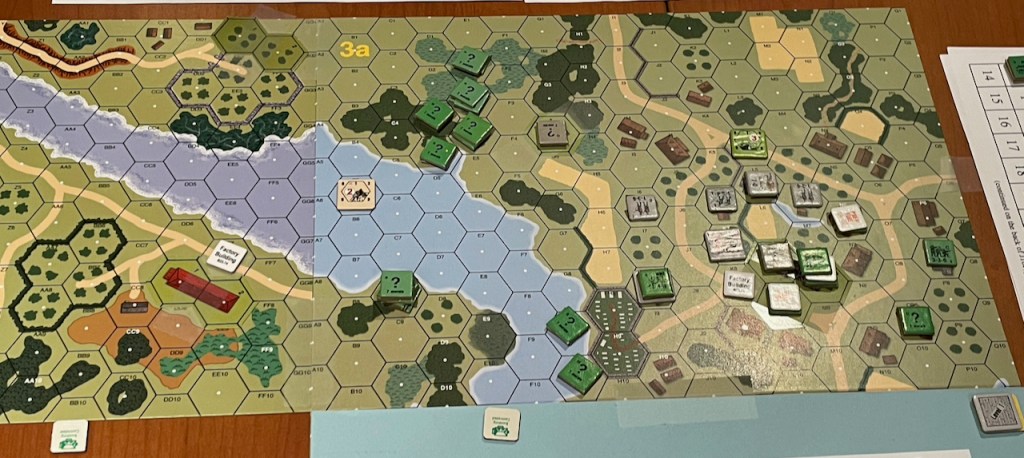
I invited two ASL buddies over to play this three player scenario. I set up the map beforehand, and I wondered where were the bridges going to go? Once I read the SSRs, I learned that the river (and marsh) hexes are level -1 hexes and open ground.

ROAR showed 7 Mutineer victories, 7 Commonwealth victories and 4 Italian victories. Based on that and an AAR I had read, we gave the Italians their balance of a hero before randomly determining sides.
I received the South Africans. Erik Lindblad received the Mutineers. Jean-Pierre Raymond received the Italians.
Both the setup and the victory conditions are out-of-the-ordinary.
Two double-hex buildings are the railway station and the arsenal. Each hex of those buildings is worth 2 VP to the controlling side. All other stone buildings (5) are worth 1 VP. The Mutineers can obtain 1 VP by successfully searching an arsenal hex for weapons. The Italians can obtain 1 VP by successfully placing a DC in an arsenal hex. The South Africans can get 1 VP for each SMC that they take prisoner.
The South Africans do not set up on map; they enter on turns 1 through 3. The Italians and the Mutineers have an alternating unit setup on board 3a for their smallish groups (Italians: 3×346, 3×136, LMG, 7-0; Mutineers: 2×347, 3×336, 227, MMG, 8-1) . I believe it behooves both sides to set up in the arsenal hexes. The Mutineers have a second group (6×347, 2×336, 137, LMG, light mortar, 6+1, 12x?) that sets up on boards 40 and 3a, but west of the town.
The Italians and Mutineers started in the arsenal and the other stone buildings in their setup area, as well as some wooden buildings. Erik’s second group of Mutineers set up to head towards town. I think he should have considered going for the train station on board 40. When the game started, most of them headed for the town, albeit slowly. A couple of concealed units moved to woods hexes from where they could interdict anyone entering from the western road. The Mutineers in the arsenal were not able to force the Italians out, so they needed to go into close combat. The CC ended in a melee that would last two turns. The melee would be shot at, reinforced, shot at again until finally going to the Mutineers.
The Italian turn 1 western reinforcements (6+1, 447, 247, LMG, armoured car, truck, jeep), came in by what was probably the worst choice: the northern 40Y10 road. Their armoured car has truck movement and only 12MP, so once it ran out of the short road, it would be going everywhere slowly. The other two entry points would have given the Italians a chance to take the railway station. They probably would not have been able to keep it against the South Africans over the course of the game, but it would have kept the South Africans busy for quite awhile. The eastern reinforcements (8-1, 2×346, LMG, armoured car) came in by assault move because the Mutineers had a concealed unit at the point where they wished to enter near the town.
Since neither the Mutineers nor the Italians went for the railway station, the South Africans (4×447, LMG, 8-0, armoured car) were able to seize it without any trouble. They were aided by an earlier breaking of the Mutineer MMG in a church steeple that could have slowed them down.
The Mutineers and Italians traded stone buildings here and there over a couple of turns. A sniper killed an Italian 7-0. The Mutineers successfully searched an arsenal hex while the melee was happening in the other hex. The turn two Italian reinforcements went straight to town to aid the troops already there. The Italians that came in by 40Y10 started heading toward the town, but were pinned down by South African fire.
Since the railway station and the nearby stone building wasn’t being threatened, I delayed my turn 2 reinforcements until turn 3, so they could enter by north edge hex 3aI1 (8-1, 3×457, 2 trucks, 3 carriers). There was a stone building that I might be able to take, but mostly it was only to be a pain in the town. I gave a lot of fun to the Italians however. I ran my three carriers all around the Italian armoured car. The armoured car destroyed one carrier after three shots, and stunned a second with its rear facing CMG and BMG. In its next DFPh, it took out that carrier and the third one. The goal of carriers dance was to have my loaded truck enter safely and unload near a stone building defended by one Italian squad. Mission accomplished.

During the fourth Mutineer turn, they were able to search another arsenal hex for another point. During the fourth Italian turn, an Italian hero was able to place a DC in a arsenal hex for a point.
Unfortunately, we ran out of time at that point. The Mutineers had the most points, 7; 2 from arsenal searches, 1 for a stone building and 4 for controlling the arsenal hexes. The South Africans came in second with 6 points; 4 for controlling the railway station, 1 for a stone building and 1 for capturing a SMC (forecasted). The Italians ended with 4 VP; three for stone buildings and 1 for placing a DC in an arsenal hex.
None of us chose to ally with another, which of course, would have made things more interesting. The most logical alliance to me is the Italians and Mutineers against the South Africans, which would also be ahistorical. The scenario is a fun experience; the only negative aspect is a bit more downtime than a usual ASL scenario.

Discover more from Low Ammo
Subscribe to get the latest posts sent to your email.

Mutineers! This sounds interesting. Thanks for the write up!
LikeLike