
This scenario is great example of designer Pete Shelling working to make victory conditions that are multi-faceted. I played this scenario because my opponent wanted to practice it for a tournament, although I would’ve played it for any reason.
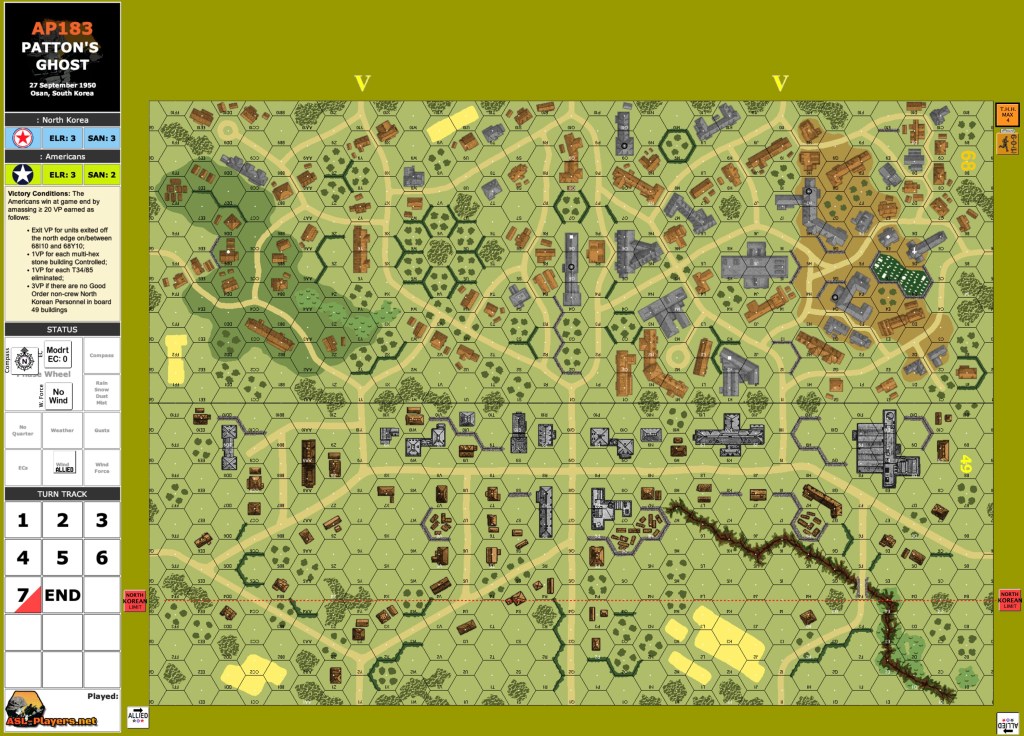
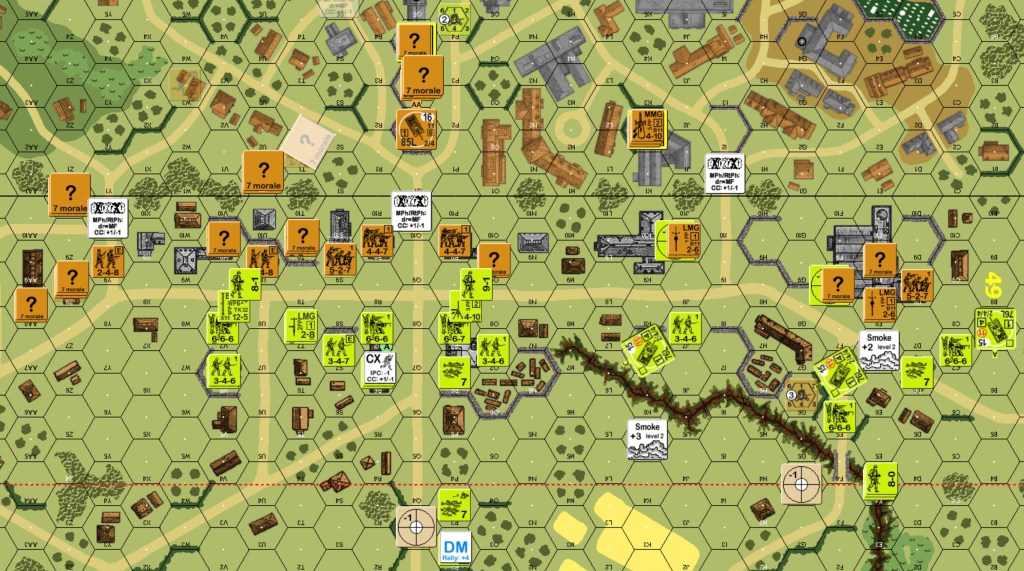
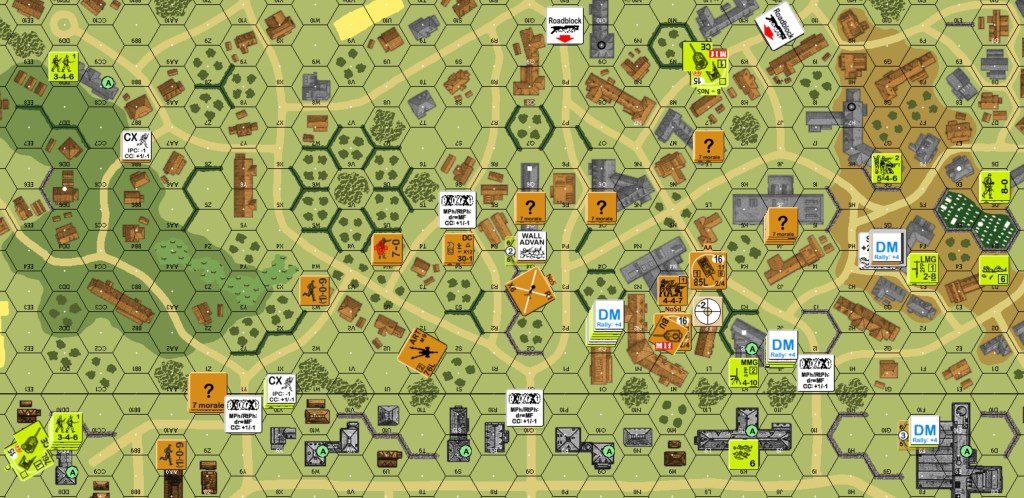
This scenario takes place in Korea September 1950 in the town of Osan. The scenario introduction mentions that this battle was part of the breakout from the Pusan perimeter. American devil squads (6-6-6) with armour support are trying to break through a North Korean defensive line in a town. ROAR shows twelve wins for each side with a recommendation of six.
The victory conditions ask the Americans to obtain 20 victory points, which they can do in several ways. They accumulate Exit VP by exiting around middle of the north edge of the map. They obtain one VP for each multi-hex stone building that they control. They receive two VP for each T34 tank that they eliminate. They receive three VP if there are no Good Order North Koreans personnel on the southern map of the two maps.

The North Koreans are a mixed bunch: three 458, five 527, and five 447 squads with average leaders. They have one MMG, two LMG, an ATR, a DC, a medium mortar, and a “crash-boom” 76mm artillery piece from WW2. They also have six concealment counters and fortifications: two roadblocks and four wire counters.
The American force is much more uniform: thirteen 666 squads with three M4A3E8 Sherman tanks. Their SW are a MMG, two LMG and two BAZ50.
Neither side has armour that can dominate the other. The Sherman’s cannon has a penetration of 17 (and unlimited APCR with 22) versus the T34/85 armour of 11 in front and side T8/H6. The T34/85’s cannon also has a penetration of 17 (APCR with 19) versus the Sherman armour of T8/H11 and side T6/H4. The 76mm ART gun has penetration of 13 (A7 with 14).
For anyone not familiar with Korean terrain, all woods are Light Woods (rule B35).
North Koreans are like Russians with Japanese THH (in this scenario). I played their side. Relevant to understanding my setup is the fact that elite NK troops can deploy. The scenario victory conditions can convince the NK to defend everywhere, like I did. My overriding thought was that the Americans would make a schwerpunkt to punch through a small area and exit all their points. This influenced the location of my wire and roadblocks, as well as the idea to setup several THH HIP adjacent to roads. I put the MMG with the only negative modifier leader in a level two location. I set up a level two spotter for the 82mm mortar. I spread out troops among the buildings of board 49 to deny 3 easy VP to the Americans; that may have been a mistake, because it left no reserves. On the other hand, this defended a lot of multi-hex stone buildings that also give points. I did not look at using the fortifications to channel the Americans into a kill zone, which is another option. I should have considered letting the aforementioned 3VP go to have a better defensive setup. Several units are in level one locations to fire over hedges or walls. Since the Americans enter from off the map, everyone will have concealment. This makes it worthwhile to make a dummy tank.
Both players need to agree that the HIP THH do not count for “Good Order North Korean Personnel in board 49 buildings” VC. I was able to confirm this fact with the scenario designer.
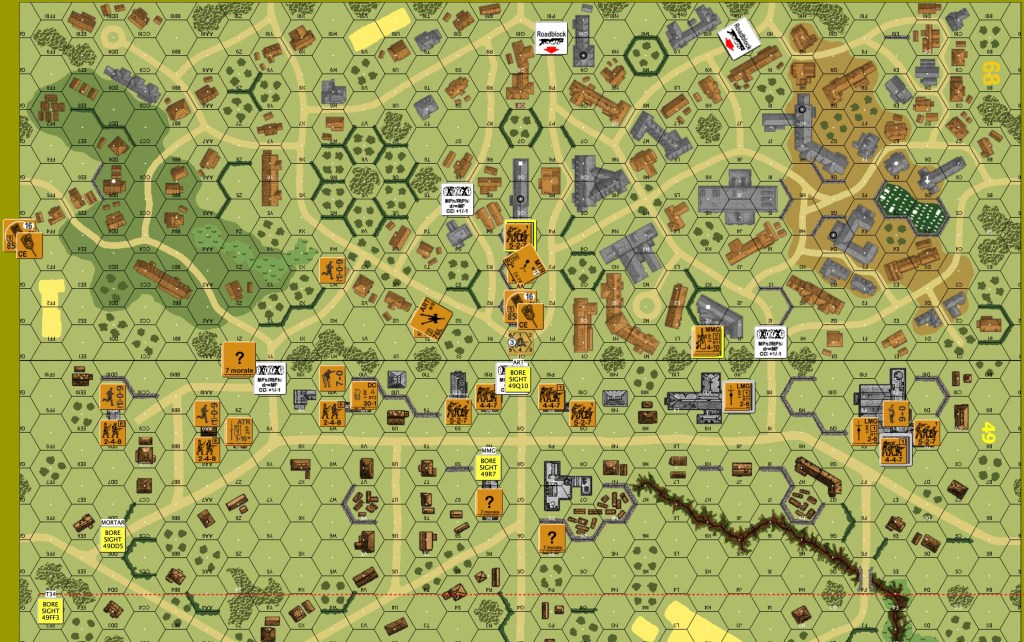
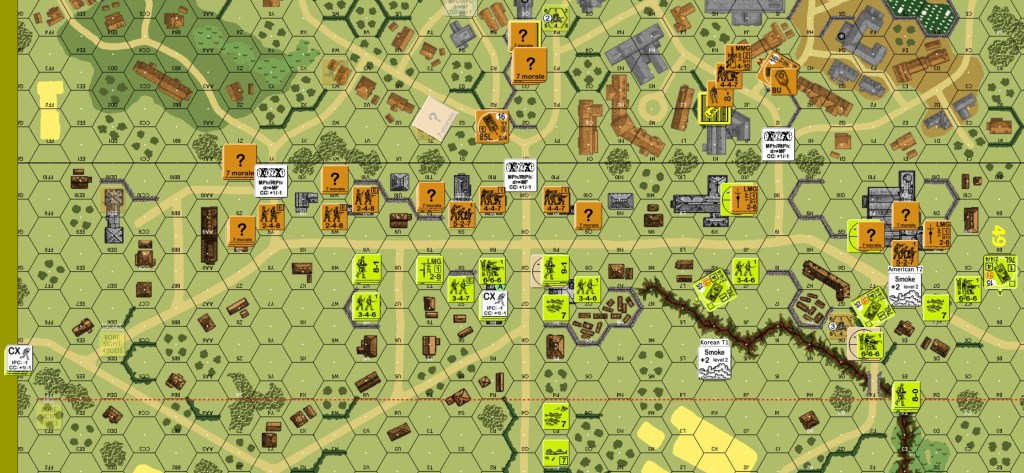
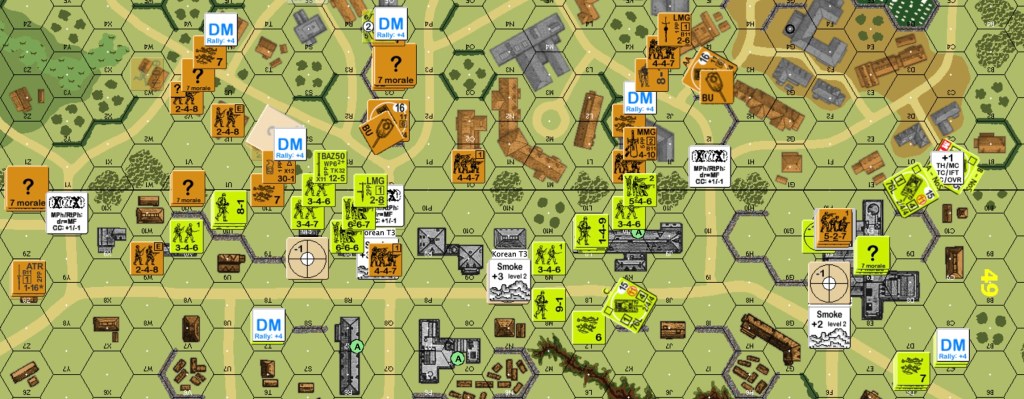
I didn’t ask my opponent about his overall plan. We played this awhile ago; I remember he cleared the North Koreans off of board 49. Any more than that, I will find out as I play back the log. The next image shows the American off-board setup.
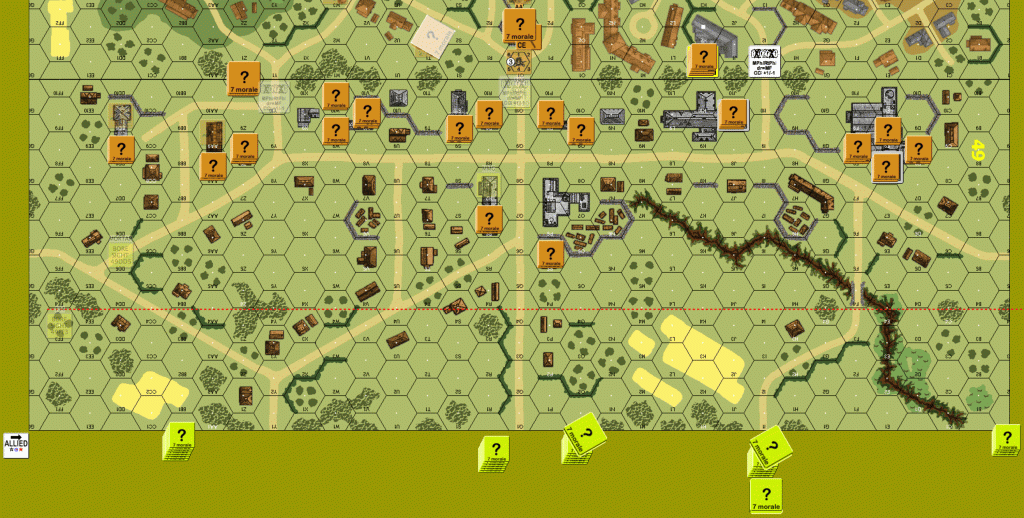
American turn one: As the American units entered, my level two units stripped their concealment. The Americans had deployed some. The NK took any negative drm shots that showed up; they broke two squads and a HS. Two of the three American tanks put down acquisition counters.
North Korean turn one: The NK mortar put smoke on the tank that was trying to take out its spotter. The mortar kept rate and fired on a squad out in the open. It obtained a hit, then rolled snake-eyes to eliminate the squad. One western HS moved a little closer to the center. Any other NK in LOS of American fire moved out of sight. The western T34 moved closer to the center. Everyone advanced back into LOS.
American turn two: No prep fire. Two American tanks, with some infantry, focussed on the 49E9 building (right in images). Only a 7-0 leader broke in the defensive fire during the movement phase. Final fire did nothing. Advancing fire saw two tanks obtain acquisition in two buildings on the American right. After the advance phase, most of the American infantry was established in the buildings south of the main east-west road on board 49.
North Korean turn two: The only prep fire came from the spotted mortar. It missed a squad out in the open. During movement, a lot of NK troops hid. The center T34 moved east to cover a road and hopefully prevent the Shermans from using it. The other T34 moved to cover the center north-south road and to try to inflict harm on American infantry. All the infantry used the advance phase to once again challenge the American advance.
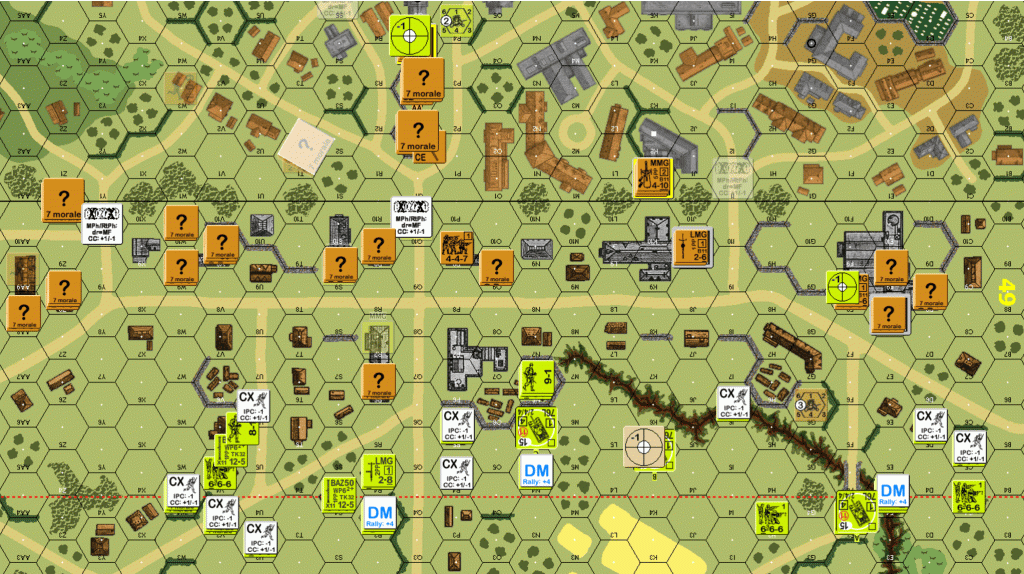
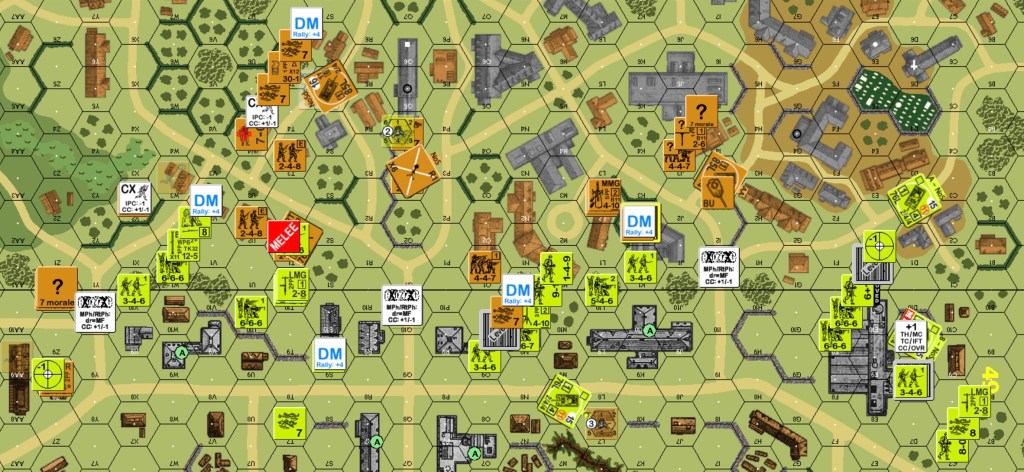
American turn three: The broken 7-0 wounded himself trying to rally. Two squads rallied. During prep fire, the middle Sherman malfunctioned its MA. My opponent chose to leave it broken for the rest of the game, since the Sherman was still worth significant Exit VP. The left Sherman had good luck against a NK LMG team, breaking them with cannon fire. The rightmost Sherman went CE and tried for its sM. It failed, but the crew was not affected by NK defensive fire from a squad and LMG. That irritating tank moved behind the 49E9 building. The center Sherman also went CE for a sM attempt, but was successful. The Sherman moved adjacent to the building; defensive fire stunned it on the second shot. All the NK units in that building shot at something, then a couple of squads used that opportunity to move forward. American units had back luck getting infantry smoke to protect units trying to cross the east-west road. Two HS went anyway. One made it, one broke. Other NK fire was ineffective and they broke the MMG. American advancing fire had no effect. In the 49E9 building, a NK squad voluntarily broke to rout to the commissar and avoid CC.
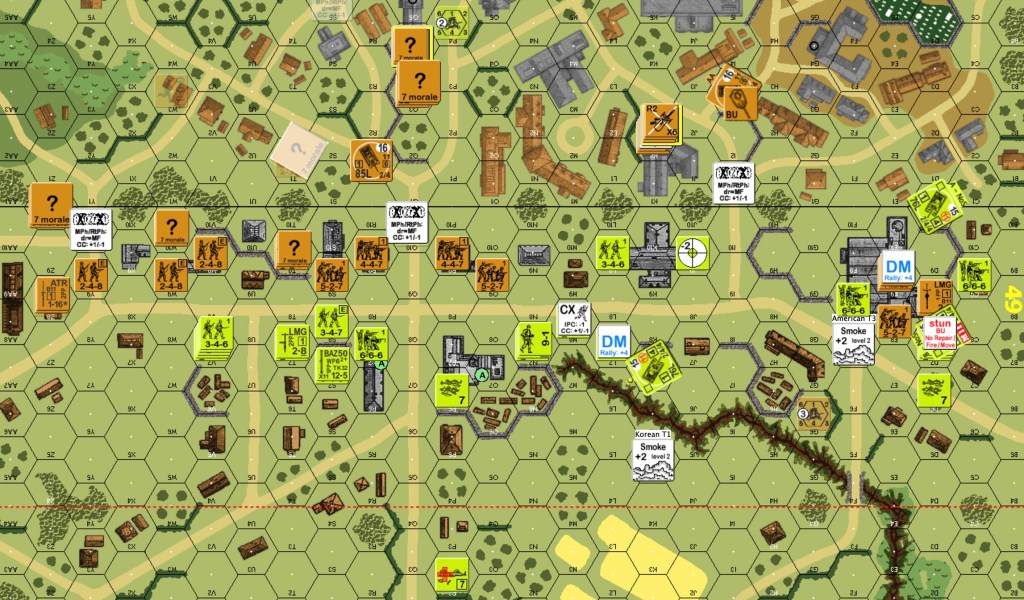
NK turn three: The commissar failed to rally the squad. The MMG was repaired. The mortar put down two smoke rounds. I think it was to cover my withdrawal, but it would also help the Americans later. The two squads in the 49E9 building tried to move away from Americans; one broke and one pinned. Everyone else was successful withdrawing. One center unit that needed to stay in LOS was broken by American final fire.
American turn four: The wounded American 7-0 leader finally rallied. The commissar brought back two squads. In prep fire, the elite squad on the ground floor of the 49E9 building survived being fired upon by a 666 from one direction and a Sherman from another direction, but was unable to prevent two more American squads from entering the building. One Sherman moved past the building. Other movement triggered snipers on both sides. The American sniper broke the spotter for the NK mortar. The NK sniper broke a squad in the 49E9 building. NK defensive fire against a squad+leader stack moving across the east-west road resulted in a pinned leader in the road and a fanatic elite squad with a hero crossing the street. This was the turn that most American units crossed, or tried to cross, the east-west road. Only a leader and HS were unsuccessful. American advancing fire broke a 527+DC just left of center and a 527 (which ELR’d) just right of center. That shot triggered the NK sniper, which put down the wounded 7-0. Two CC’s took place. Two 666 versus a 447 in the center; result ambush withdrawal into smoke by the 447. Two 666 versus a 458 in the 49E9 building; result 458 eliminated.
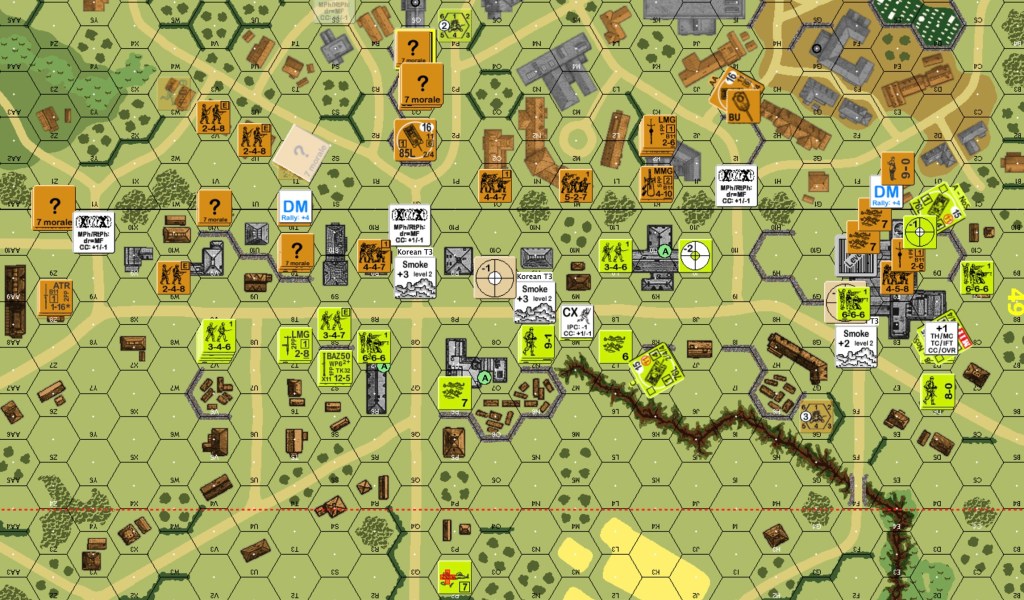
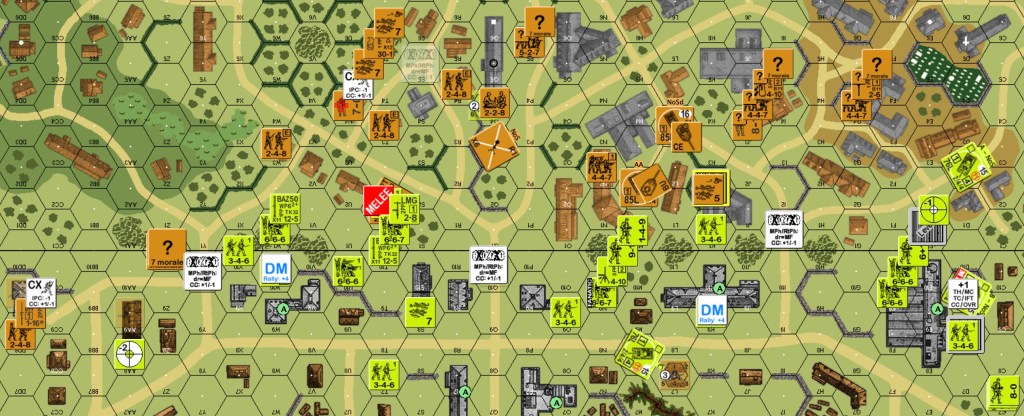
NK turn four: I feel like my MLR has been perforated without a successful withdrawal by my troops. No one rallies on either side. The spotter-less mortar fired at Americans it could see, missed, tried IF and broke. In the 49E9 building, a squad moved closer to the nearest tank and rolled successfully for a THH. The THH soaked up a good amount of fire before dying. The NK troops generally withdrew during this turn. The NK 7-0 on the left was wounded in the process. The center T34 tried a hit-and-run against the nearest Americans; there was no effect and it moved further back. American DF broke a squad in the 49E9 building. Looking at the situation now, I asked myself why did I not use the 76mm ART gun against the nearest Americans. Firstly, it was pointed in a bad direction for that. Second, the nearest two stacks each had a bazooka. Lastly, I think I was still trying to catch troops moving in the open.

American turn five: An American HS rallied. No NK troops rallied, which was extremely bad for the guys in the 49E9 building. The two 666 in that building successfully approached the last Good Order NK squad. A Sherman moved north to higher ground from where it could also fire at that last squad. There was no prep fire. A HS moved to force FTR on the broken NK squad in the 49E9 building. Left of center, a HS bumped into the HIP gun. As troops shuffled around the gun, defensive fire by a HS broke a leader. A Sherman and some troops moved towards the stranded 447 in the middle. In NK DF, only the gun was successful; it broke a HS, but still had another HS adjacent. American advancing fire broke the stranded 447 in the center and DM’d some broken units. During rout, the Americans declared NQ to eliminate the broken squad in the 49E9 building. In CC two 666 rolled snake-eye against the 527 in the 49E9 building to eliminate it and generate a 6+1 leader. A HS eliminated the commissar. A HS failed to eliminate the gun crew, which also failed, giving a melee. The Americans have 6VP now.
NK turn five: One squad rallied on the NK side. One squad rallied for the Americans. The only prep fire was to DM a broken leader. A NK HS in the west moves further west to lure Americans that way or prevent the three VP for board 49. Infantry fall back some to continue denying easy buildings to the Americans. The right side T34 goes after a 666; it inflicts a MC which the 666 boxcars. The other T34 joins this one to cover for its bad ending position. American final fire is ineffective on the few targets that I gave. The melee with the gun crew continues.
American turn six: No successful rallies for the American. One squad rallied for the NK. No prep fire. A HS in the west runs into the valley, aiming for a distant building. A Sherman took on the ATR crew in the west, even giving them a side shot opportunity; they missed. Two and a half squads head that way to assist; one is pinned. In the east, a leader-two-squad stack moves to the high ground near the NK LMG team. They inflict a NMC. The entire stack breaks. The nearest Sherman moves to take on the LMG team. A second Sherman moves to protect the broken stack from NK tomfoolery. A leader and squad move towards the rally location. Near the T34 tanks, an American HS and hero move separately into a building that has a broken NK squad on the second level. Trying to prevent the elimination of the NK squad, a T34 fires its MGs and MA, breaking its MA. The Americans units passed their MC. The CC with the gun crew continued in melee. The Americans have 7VP.

NK turn six: No miracle self-rally for the broken NK squad in the 68K1 building. No American unit rallied. No prep fire. In the west, the ATR team assault moves away from the adjacent Sherman, but towards an American squad. I see a stupid error after that. A squad and leader double times from 69U4 heading west to get into the building that an American HS is aiming to own. Two problems however; the leader is wounded and the stack spent 9MF! The two T34 swap positions so that the one having a cannon can protect the one that doesn’t. American defensive fire is limited and not effective. Another NK squad dies for FTR. The melee with the gun crew finally ends with an American victory. The Americans have 8VP.
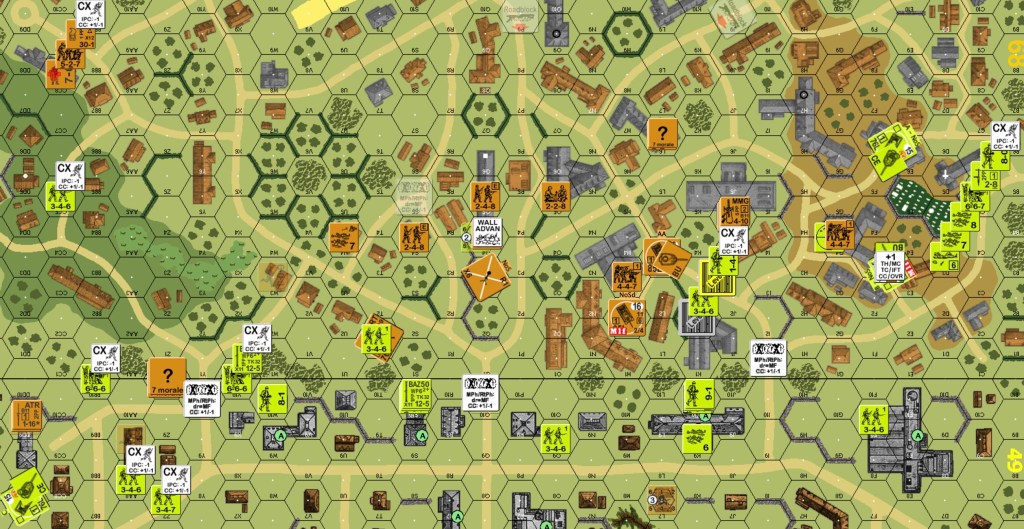
American turn seven: On this final player turn, the Americans rallied two squads on the east. No prep fire. In the west, the Sherman moved adjacent to the ATR team and bounding fired for a pin result. I was hoping the Sherman would bypass the building hex so I could use the HIP THH there. American infantry move adjacent to the ATR team which rolls boxcars for DFF. I see the we noticed the wounded leader double time error now. We fixed it, which left a NK HS at the crest of the valley where it would have a shot at the American HS as it moved. The shots were ineffective. In the center, several American units approached building 68M3 which had a defending 447 squad. One squad made it adjacent. In the east, an American squad tried to tempt defensive fire from the NK squad in building 68G4 by moving adjacent. It didn’t work, so the Sherman used its smoke mortar to give it the best chance to exit; it exited for 7VP. American infantry moved to attack the T34 tanks. A HS and hero made it adjacent; a leader and squad did not. In final fire, a T34 cannon shot eliminated the hero, with rate. The second shot eliminated the HS. The other T34 with no MA pivoted its turret to fire at an adjacent squad; it broke that squad. During the rout phase, the NK unit in buildings 68G4 (east) self broke to avoid CC and retain control of its building. I did not do that in the west building 49DD9. I think it was because breaking would give 3VP, since it was the last Good Order NK unit in a board 48 building. Seeing that a leader, squad, and two HS were adjacent, however, my reasoning was flawed. By not self breaking, the ATR team would probably die in CC and give 4VP instead of 3VP because the Americans would control that building as well. The Americans won the CC. Other units moved to control empty buildings in the east.
The Americans finished with twelve multi-hex stone buildings controlled for twelve points. They exited a Sherman for seven points. They cleared board 49 of Good Order NK units for three points. Total is 22 VP, two more than needed.
I don’t know whether to be happy that the issue wasn’t decided until turn seven, or be disappointed the my defence did not work better. I regretted trying to hold the 49E9 building, rather than withdrawing the platoon. I thought it was difficult to use the T34 tanks effectively because they were worth VP to the Americans. My placement of the 76mm ART gun was not good at all.
Discover more from Low Ammo
Subscribe to get the latest posts sent to your email.
