
This scenario that I played recently just cried out to me for a write-up because I don’t know if I’ll ever play another scenario with 104 Japanese squads. Bruce Reinhart and Steve Swann designed this scenario as part of the Leatherneck Pack #1, released by Critical Hit in 1995. It was my opponent’s idea to play this scenario.
The action takes place on the Tanapag Plain of Saipan in July of 1944. The combined introduction-aftermath describes a death ride, of sorts, that Japanese soldiers were commanded to make. They knew they would die and their commanders wanted them to take as many of the enemy with them as possible. An early morning (still dark) all-out attack was their solution.
The attack found a gap between battalions. After going through the gap, the Japanese encountered marine artillery batteries and army units.
This is a night scenario with a difference; no cloaking or concealment for the Japanese attacker and no concealment for the Americans after they loose it. The NVR starts at two, and goes up by two every time the Japanese enter a new board (to a maximum of six), to reflect the sun rising. The Americans start on “No Move” counters, but the removal of those counters is different than normal: when the Japanese enter a board and an American unit on that board has a LOS to a Japanese unit, then all of the American units on that board lose their No Move counters. There is no Straying; I suspect that was to speed up play. For those players unfamiliar with the night rules, it is important to know that multi-location fire groups are NA.
The environment is PTO with dense jungle. Roads exists as printed. Any water obstacle can be crossed as if it is a shallow stream. Buildings and huts are on the map, as well as wooden rubble placed in specific hexes by SSR. There are five building overlays.
There is an SSR that allows any broken American unit to try to self-rally anytime an enemy unit enters it location. Considering that the broken unit will always be DM, it is rare that the unit will succeed. During our game, I estimate the unit self-rallied in one attempt out of ten. Another SSR allows both sides to attempt to self-rally two broken units in every rally phase. As well, all CC is HtH. Oh, and both sides have a SAN of five which becomes seven at night. That’s a lot of sniper activity.
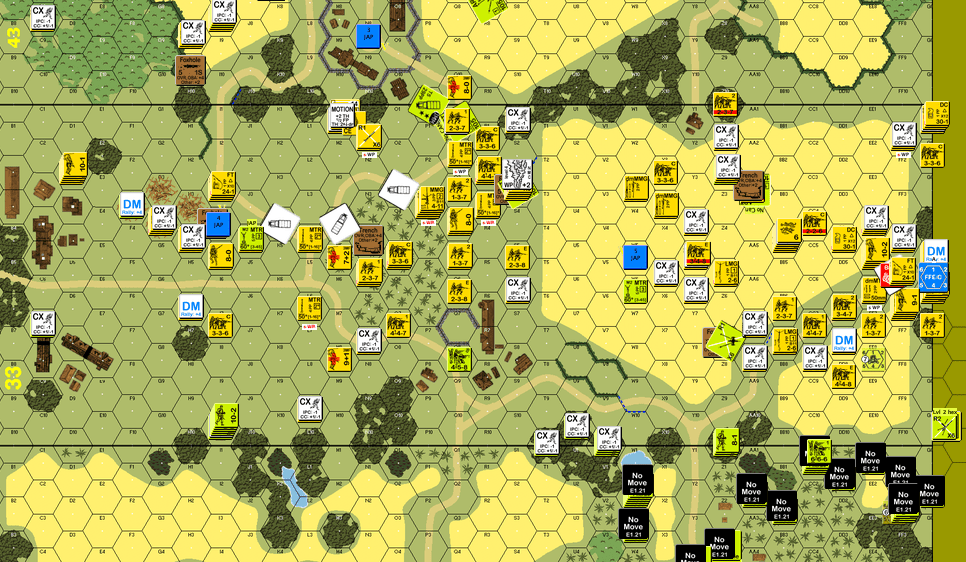
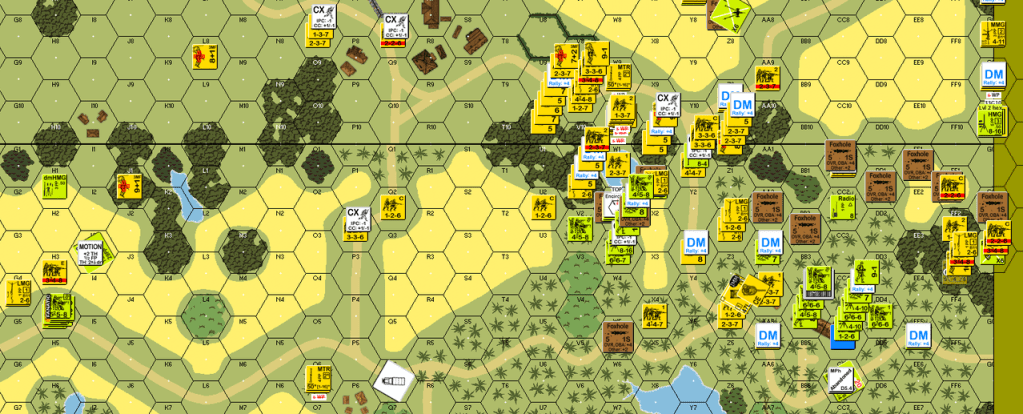
The play area consists of four map boards. North is at the top and the Japanese enter along the north board edge.
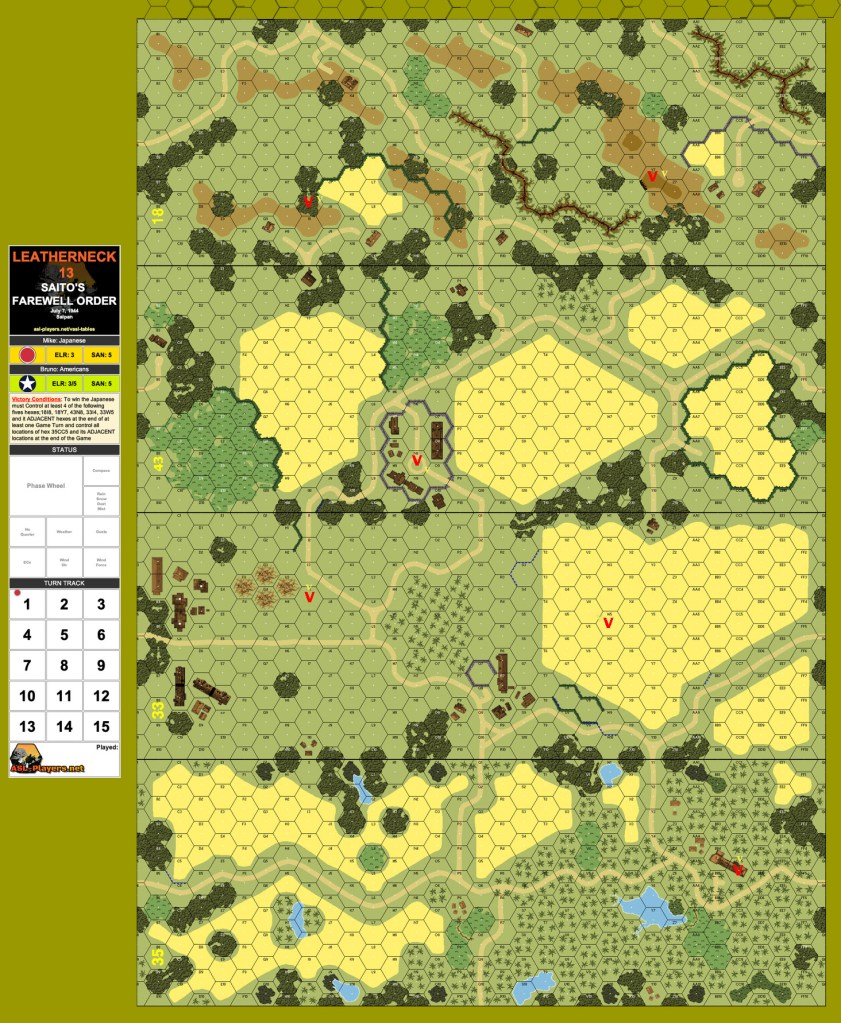
The Japanese have fifteen turns to run through five specified hexes and their six surrounding hexes at some point in the game on the first three boards. They also need to control one specific hex and its surrounding hexes at the end of the game; it is on the furthest board from the Japanese entry. The above image shows the victory hexes with a red “V”. Having finished playing this as the Japanese, I can say that I wish I had spent more time thinking about force allocation. With so many squads, I made a fairly evenly weighted wave at start. It is possible that it might be better to designate three groups; one to move quickly towards the final hex and two groups for taking the other five victory hexes. The disadvantage to using a fast group is that it will help the Americans lose the “No Move” counters sooner. All concealment terrain hexes cost one MF extra at night, slowing down movement. Every Japanese squad that comes in the Japanese module is in this scenario; 26 elite, first line, second line and conscripts. This mob has 28 leaders, 12 LMG, 10 DC, 10 light mortars and two flamethrowers. Supporting them are six crews with MMG and two 97B Chi-Ha tanks.
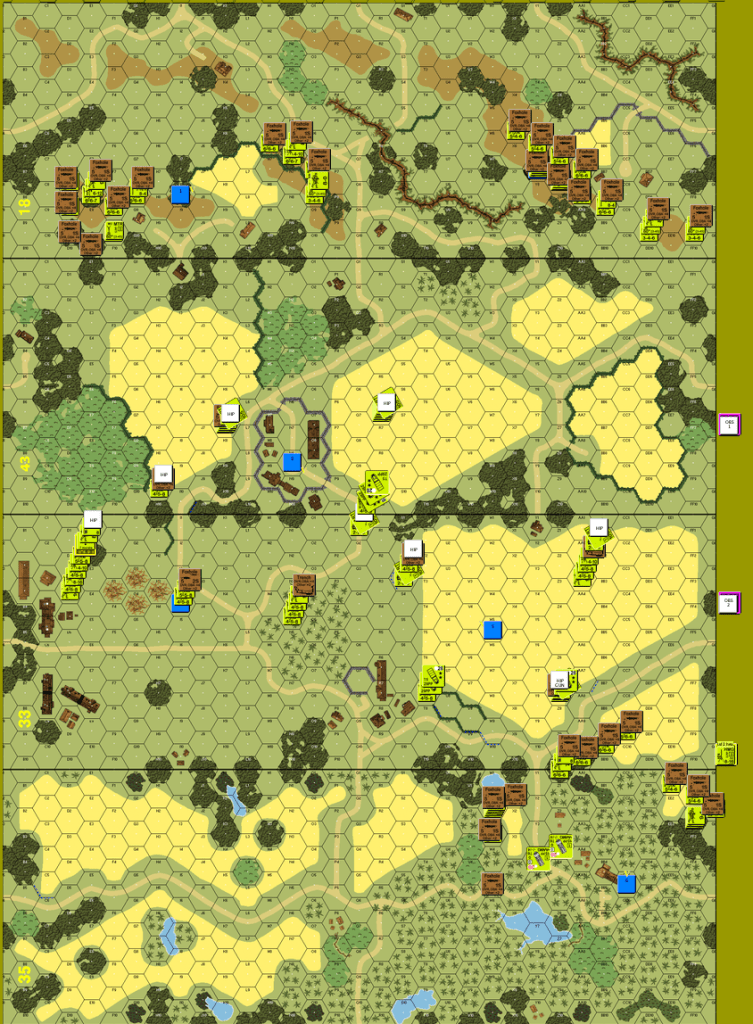
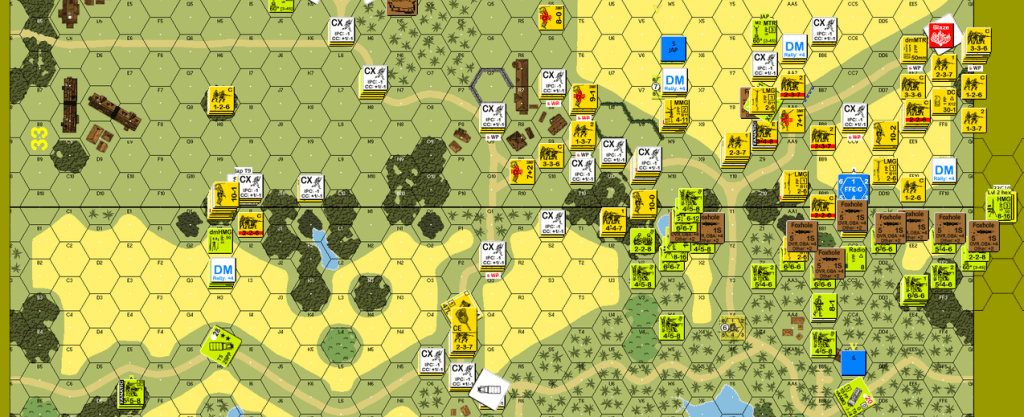
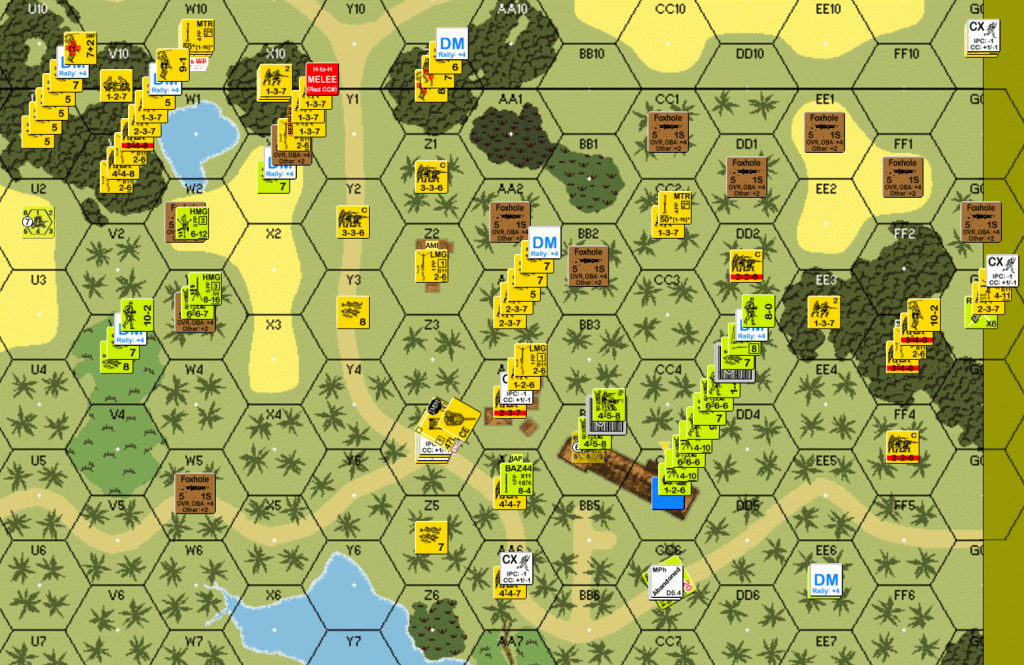
The American units are split into six groups. Each group sets up near one of the victory hexes. Aside from those units, the Americans also have two 60mm OBA modules with off-board observers, two NOBA modules (IR only) with radios, and a .50 cal HMG offboard on level two. The following image shows approximately the six American setup areas.

Groups A and B are army. Group A has nine squads from elite to second line, three leaders, a HMG, a MMG, two light mortars, one Baz44 and ten foxholes. Group B has an identical make-up, but one leader is a 9-2.
Group C is a marine artillery battery having six 4-5-8 squads, two leaders, a MMG, three M2A1 105mm howitzers, three trucks, three foxholes and a trench.
Group D is a marines HQ group consisting of ten squads (4-5-8 and 5-5-8), three leaders (one 10-2), a .50 cal HMG, a MMG, three foxholes, a trench and a radio for the Naval OBA IR missions. At some point in our playing, the 10-2 battle hardened to a 10-3.
Group E is another marine artillery battery, identical to Group C.
Group F is the army regimental command post. This group has 11 squads (elite, first line and second line), three leaders (including a 10-2), a .50 cal HMG, a smaller HMG, a MMG, a light mortar, another radio for the second Naval OBA IR, two M3 halftracks and eleven foxholes. I suspect the best use of the artillery batteries’ guns is to set up hooked up to the trucks and move back to protect the final victory hex.
As well as each group having its own setup areas, there is additional verbiage to prevent the groups from being too close together. Some groups’ setup instructions state “…and > 4 hexes from any other American unit”. Taken literally, it would be very difficult to make a decent defence because all the units in a group would be trying to fit in a small area while being > 4 hexes apart. I asked a former play tester for this pack (Burnie Hegdahl) about that. He informed me that the intent is this: “…and > 4 hexes from any other American group”.
The Americans get some of the night benefits: recording of SMC and SW instead of being on board; 25% of squad-equivalents can set up HIP; however, they cannot set up dummy stacks.
The following image shows the setup of my American opponent. It has a few units set up illegally and a couple in less than optimal positions because of the confusing setup text.
The scenario specifies for the Japanese “Enter unconcealed and uncloaked on Turn 1 along the north edge of board 18 with at least two MMC per hex.” I put more than that to have troops get closer faster. The leaders were stacked with various combos; sometimes elite squads with LMGs, sometimes with mortar teams, sometimes with crews and MMGs. In the images that follow, I will not have the VASL night shading turned on.
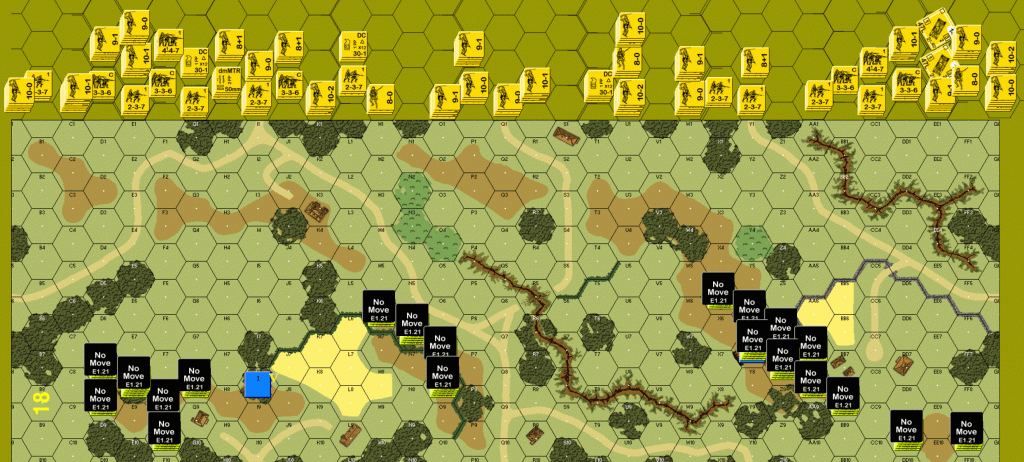
My plan for the first turn was only to move up without getting within the NVR of two, and then use the advance phase to get into NVR. Obviously there were no American attacks. By SSR, all Japanese units have 6 MF and may double-time. Here is the result of that turn.
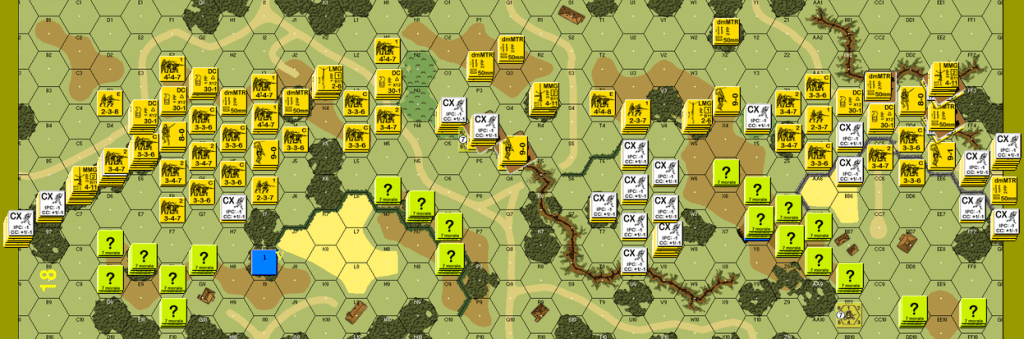
Since the Japanese have been seen by American units on that board, all the No Move counters have been removed on that board. In Japanese turn 2, the fun starts. There is way too many units to do a turn by turn accounting of the game. I will try to give a decent summary of the action. As you can imagine, the Japanese fired smoke or WP and then made some banzai attacks and DC hero attacks. They took some casualties, but few American units were able to escape off of board 18. The Japanese were careful to not enter the next board until most of the troops caught up. The American OBA got into action. Even though it is only eight firepower, the Japanese are often caught moving in the open by it.
At the end of two player turns, things looked like this.

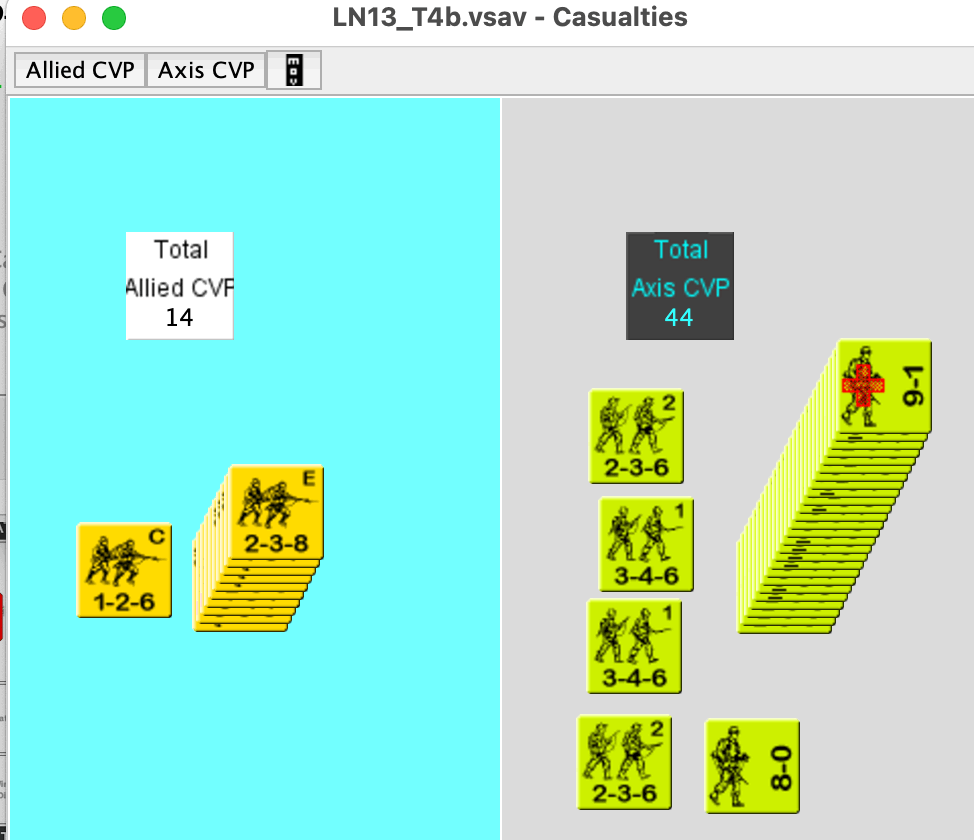
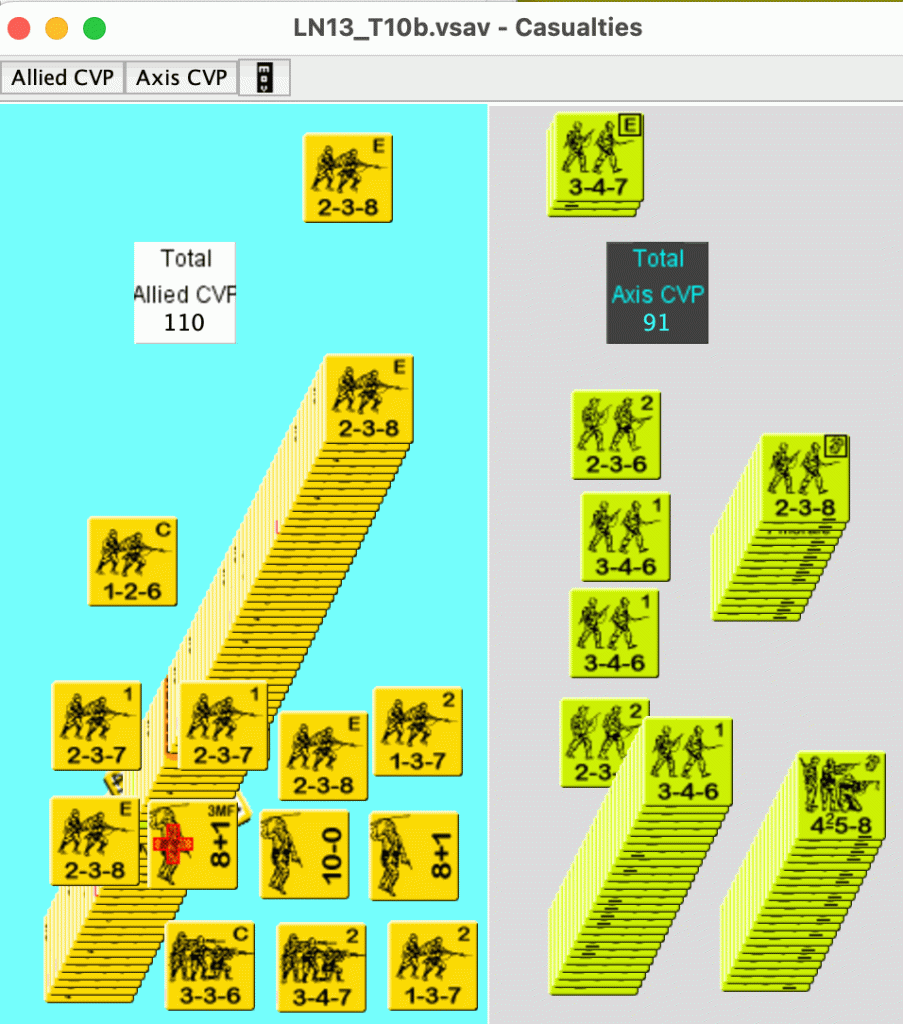
The Japanese have a slight problem with congestion. Here is the casualties bin at that point.

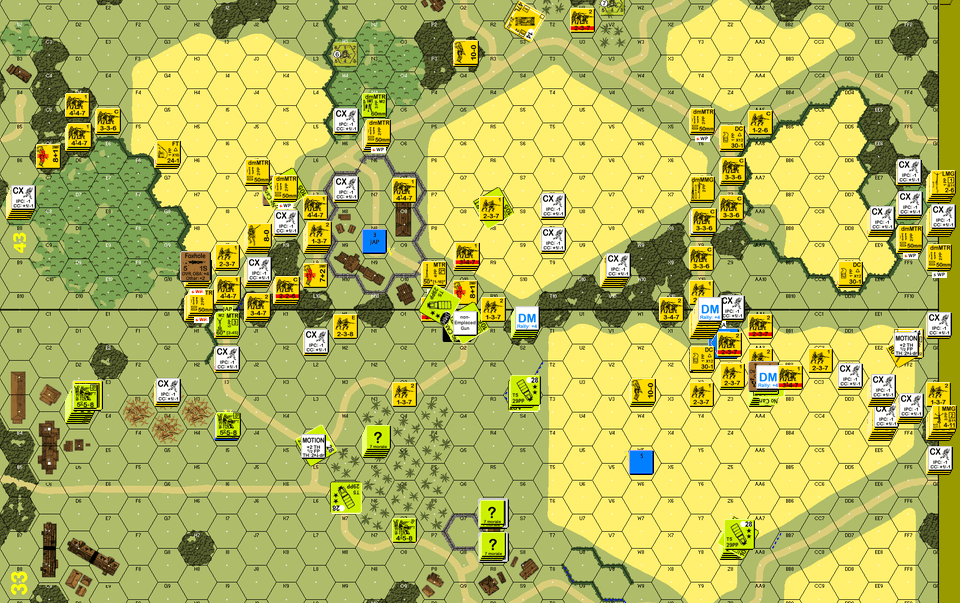
At the end of the fourth turn, the Japanese have reached the end of the second board. Too many Japanese units are moving through kunai or jungle at a cost of 3MF per hex. The NVR is now four.

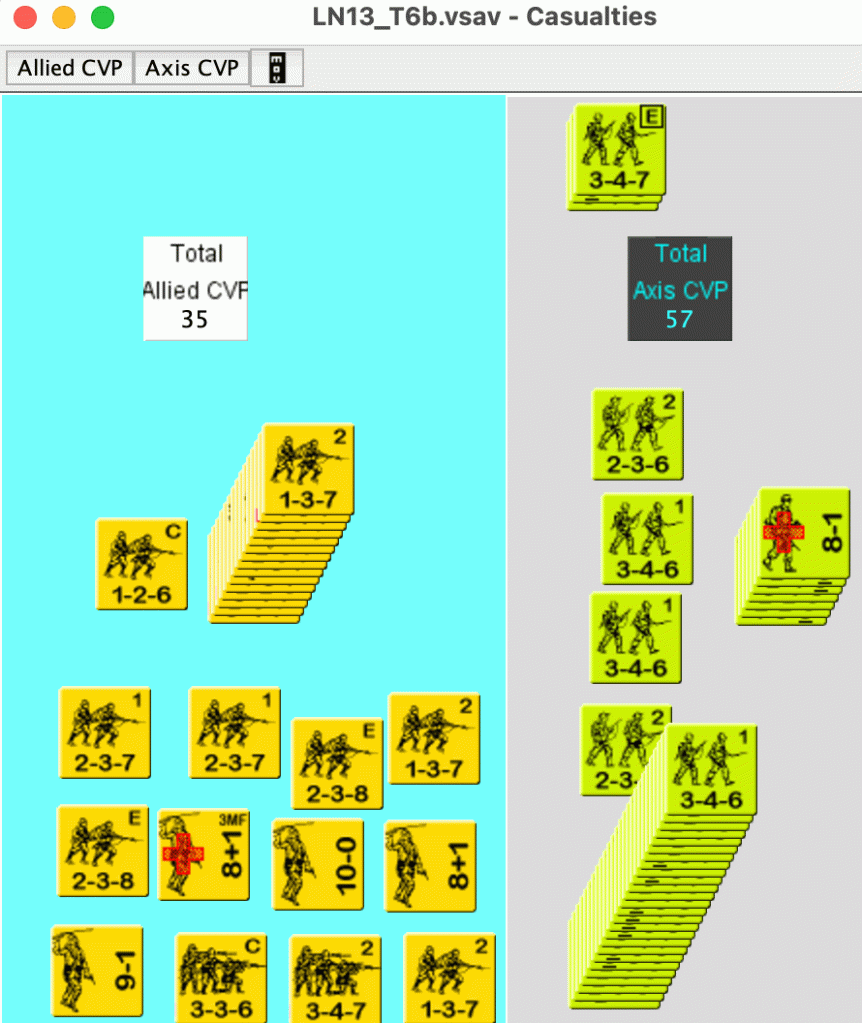
Here is the casualties bin.
The Japanese casualties are probably a little higher than shown. It is easy to forget to put a HS in the bin as a squad step reduces. In turn five, the Japanese could have entered the third board, but did not; they needed to let a lot of stragglers catch up. One of the American OBA modules had two missions and then two reds. The other OBA module drew eight black chits in a row!
The Japanese enter the third board on their turn six. The HIP American 10-2 led kill stack appears on the left of the map and definitely makes an impression.
In turn seven, an American 105 takes out one of the Japanese tanks with a HEAT shot. That causes additional problems because it lights up part of the map. The American kill stack on the left decides to displace rearward. A lot of Japanese troops are pushing through kunai while being attacked by OBA. After eight turns, some units are a full board behind the action.

The Japanese have passed through the five victory hexes that they needed to pass through before tackling the last one. The American kill stack that was trying to fall back was smoked and succumbed to a DC hero and banzai. The Japanese start hitting the final American defence line. One of the halftracks was recalled by a sniper.
After ten turns:
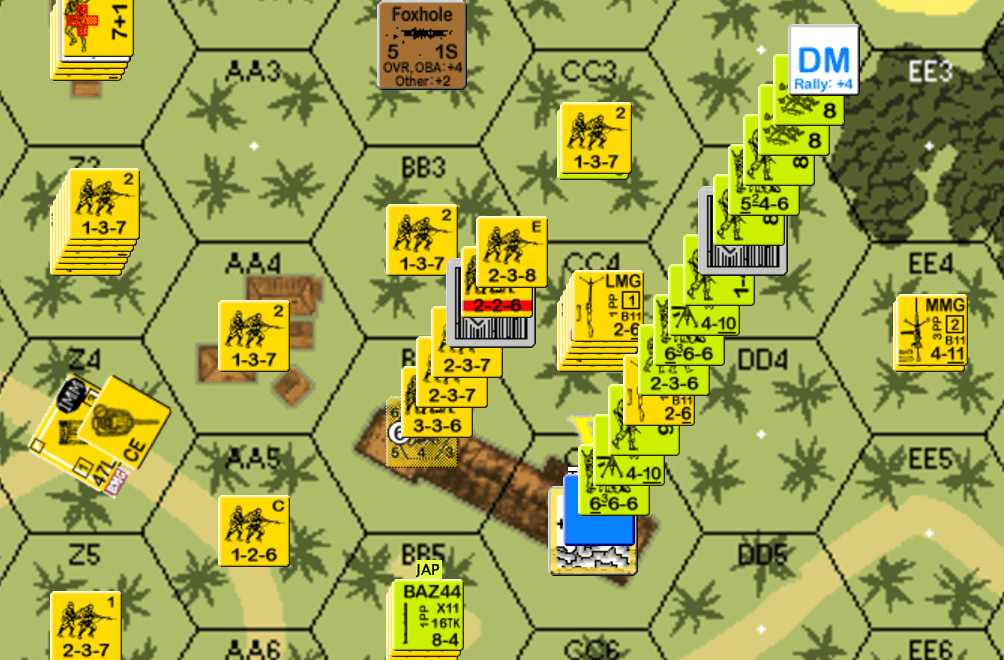
Here is an “action” shot during Japanese turn eleven. An American 10-2 is part of a kill stack with two HMG. The stack is killing a lot of Japanese units while they try to get to where they need to be.
After twelve turns, the Japanese have pushed back the 10-2 kill stack a bit. They are closing in on the final victory hex. Their tank immobilized on an ESB to stop attempt near the victory area. The Americans have fallen back with a reasonable number of troops into that victory hex area.
The casualties for the Japanese were very high during turns eleven and twelve.

At the end of the thirteenth turn, I was on the verge of conceding. I had so many broken units and very few squads. My opponent thought the match was still close because he felt like he had almost no units left. He convinced me to play on.
On turn 14, a Japanese light mortar managed to smoke the victory hex, which was also where most of the American units were located. This made it possible to banzai a lot of units towards that hex, even if they couldn’t reach it this turn. Some units reached the ground level locations of the building with the victory hex. Although the Japanese cleared one building hex, the CC in the victory hex did not go in their favour.
In the DFPh of American turn 14, I got my hopes up a bit when multiple point-blank shots into the smoked building hex surprisingly broke a number of American units.
Unfortunately for the Japanese, one American squad in the bottom location was able to self rally during the banzai, as well as one leader in the top location. At this point it has become very difficult for the Japanese to win, because at night there is no elimination for failure to rout. My remaining Japanese units needed to use close combat to eliminate every American unit in the two locations of the victory hex. On the other hand, after fourteen turns, why not play one more turn to be sure.
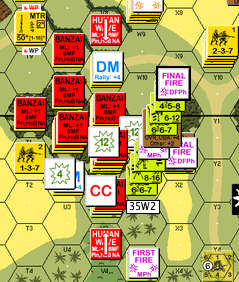
Japanese point blank prep fire broke the just-rallied-squad and eliminated a couple of HS on the ground level. I had only a striped conscript squad and an elite HS on level one of the building, so I decided to declare a banzai to get more units into CC with the Americans on level one. One of the broken American squads did that SSR self rally! The defensive fire from two squads broke the first Japanese units that entered that hex. The follow-up banzai units of a squad and a HS survived. I was later able to move only one more HS adjacent to the level one Americans; a broken American leader in the location did the SSR self rally when the HS advanced in. A similar thing happened on the ground level as well. I had to keep a few units in the surrounding hexes in case of ambush withdrawal. We resolved the upper level CC first because it was the harder of the two. There was no ambush achieved by either side. The Japanese had six FP to the Americans’ eleven FP; a one to two. The kill number for HtH is six. Japanese, of course have a -1 DRM. My roll was a seven; the one-to-one attack back eliminated all the Japanese units to give an American win.
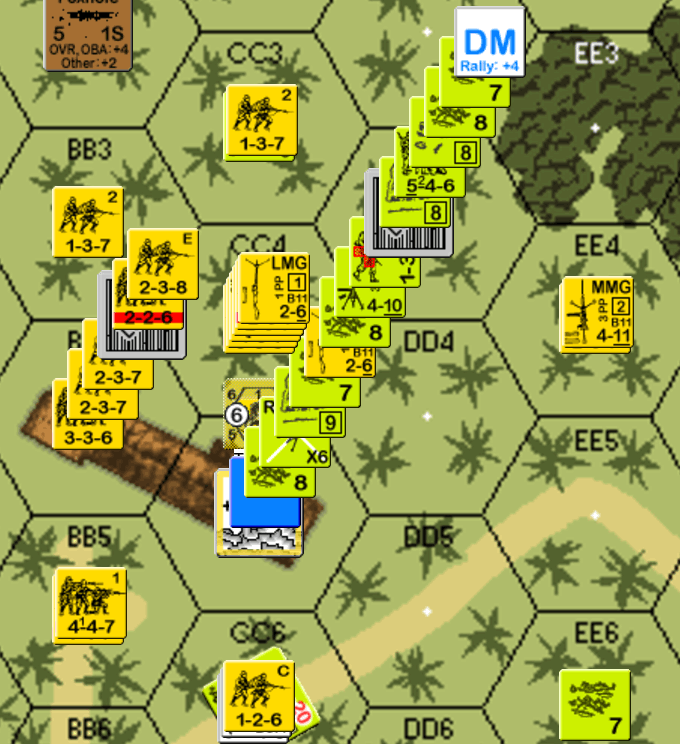
Here is an image of the CC before resolving. We used the boardzoomer extension to be able to place the level one units beside the ground level units.

Do I feel this scenario is worth playing after having done it? Yes. Is it a big commitment? Yes. Since I keep a log of every VASL session, I know we played 18 sessions, assuming I never forgot. Our sessions average three hours, but we probably play slightly less than that with being sociable and taking bio-breaks. That amounts to about 54 hours, not including setup, but including occasional rule look-ups. The American side is a bit less fun to play, but not unusually so for the defender in a night scenario. In our match, both sides had to pass a personal morale check; in the beginning for the American and closer to the end for the Japanese. It was quite the adventure and experience.
I put some clarifications for the scenario in the ASL Scenario Archive for the next people who play it.
Discover more from Low Ammo
Subscribe to get the latest posts sent to your email.

This is gotta be the largest IJA scenario I have ever seen. Look at the stack of casualties!!! You ain’t kidding about having to pass your PMC. My heart thumps quicker when I see his many IJA squads appearing over the map ‘horizon’. DANG!
Noted the errata. Thanks for the writeup!
LikeLiked by 2 people
Playes this solo when first came out in the 90’s. Absolutely insane scenario.
LikeLiked by 1 person