
In May 1940 France, German infantry with 5 AFV try for buildings vs infantry with 1 AT gun, wire and roadblocks. I played this game face-to-face at a recent ASL get-together in the Montréal area.
Here’s the map.
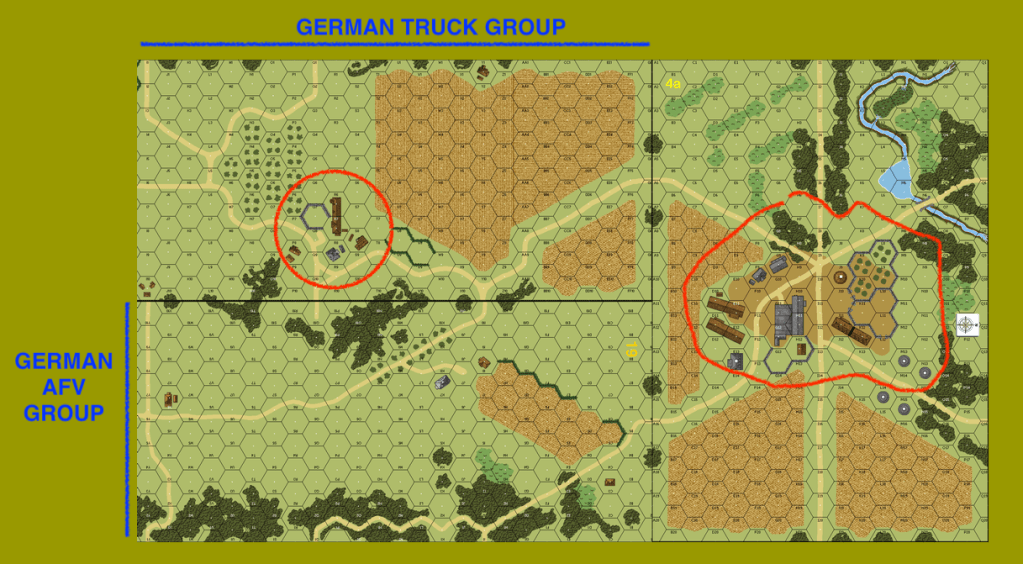
The main British force sets up within two hexes of, or on, the hill on board 4a. That group has 4×457, 3×248, four leaders (a -1 and three 0), one MMG, two ATR, 10 concealments, 3 roadblocks and ten wires.
The picket group sets up near hex 33R7. They have an 8-0, 457 and MMG. Reinforcements enter during turn three from the north edge; 2×457 with one LMG with an 8-0,
The buildings on board 4a are worth VP to both sides. To win, the Germans need more VP.
The Germans enter as two groups that I’ve called the Truck group and the AFV group. The Truck group has four trucks, a squad size motorcycle, nine squads, three leaders including a 9-2, a MMG, two LMG, and two DC. The AFV group has three 35t tanks, two PSW 221, three squad size sidecars, a wagon carrying a dm medium mortar with crew, five squads, three leaders (all -1), a MMG, a LMG and two DC.
The German force is clearly stronger, but they have a lot of open ground to cross to reach their objective.
Having played it as the Germans, here is what I wish I had done. I believe the Germans need to send half-squad motorcyclists from both groups to recon where the wire has been set up. It may even be worthwhile to send the two armored cars as well to suss out the two anti-tank riles and the AT gun. Obviously, the Germans must neutralize the British picket group as soon as possible. The truck group might do well to enter loaded from the southwest corner and then proceed to where the wire is not. They could even pick up some of infantry of AFV group. They would need to debark as close as they can to the hill.
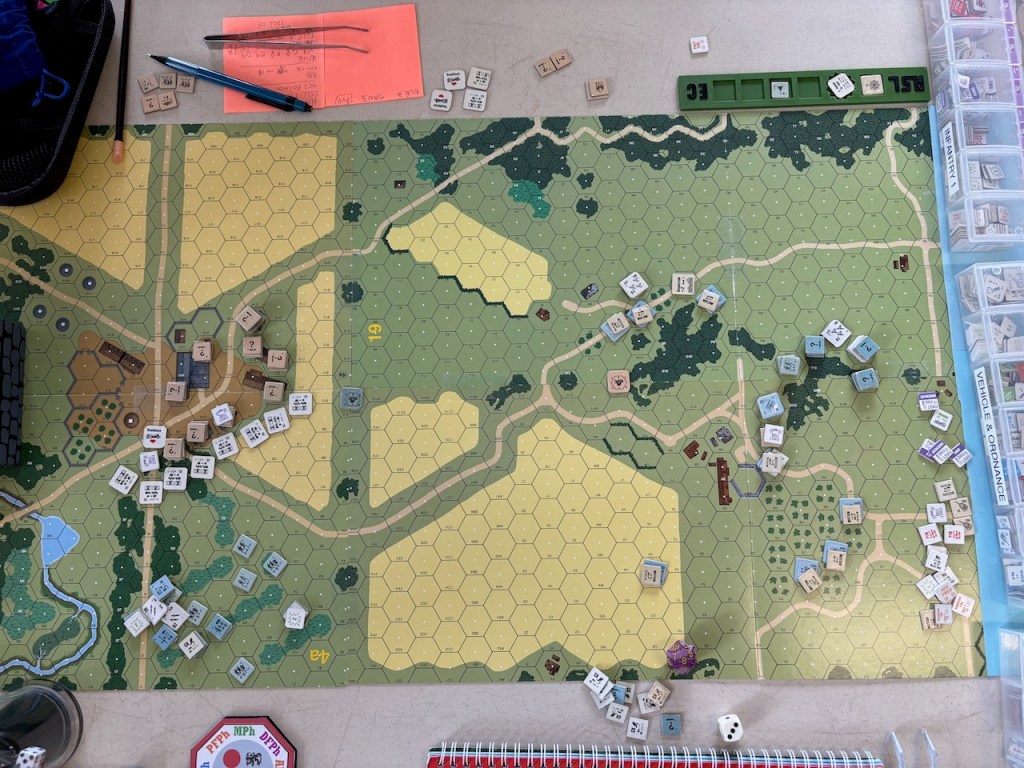
In my match, the truck group walked onto the board where board 33 meets board 4a. They walked to a string of ten wires, taking some casualties on the way there. They then became stuck on the wire for too long. The trucks hung around the British picket to screw up their anticipated rout. I sent the AFV group motorcyclists mostly after the picket with two AFV to help out. Everyone else in that group went as far as the orchard road on the first turn. A small force trying the right German flank was destroyed. I took a long time to set up the German medium mortar to provide smoke. When it finally got into position, it obtained only one smoke round. The British picket group had only one defensive fire phase of shooting in the second turn after staying HIP during the first turn. The Germans eliminated them soon after that. The German infantry then made their way towards the objective, again crossing open ground and taking casualties. After four turns, I had just gotten some infantry through the wire and even one squad behind the hill, but all my armour was gone. With the other casualties that the Germans had taken, decided to concede.
My opponent and I enjoyed the scenario, although I wished I’d played it differently.
Discover more from Low Ammo
Subscribe to get the latest posts sent to your email.

Glad to see board 4a get some love. It’s a cool board. Admittedly, it’s tough – at least for me – historical actions what would call for that unusual terrain, but it’s cool when someone is able to!
LikeLike
I am never any good at crossing Open Ground (hence horrible with Arid Terrain scenarios etc.) I always stayed in the open too long. Gotta do what you did : just cross the dang thing and take whatever losses.
LikeLike