
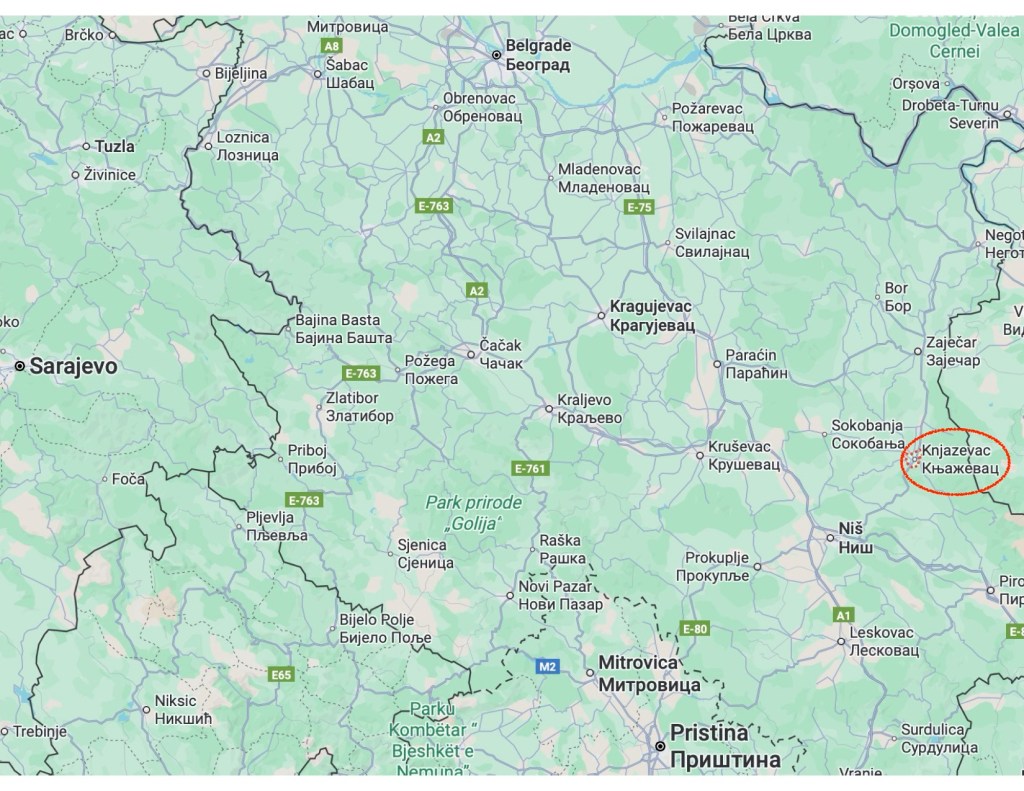
This is a unique change-of-pace scenario from designer Philippe Naud. The Scenario Archive shows over 200 designs for Philippe in various publications, including MMP. The original French title is “Macedoine Balkanique”. The date of the scenario is October 1944. The location is Knjazevac, Serbia. The strategic situation is German forces trying to keep open a corridor through Yugoslavia for their forces in elsewhere.
The scenario starts after the town garrison has been in conflict with Bulgarians and been reinforced with SS troops. The Germans are beset by the Bulgarians to their north and elements of a partisan division(!) to their south. The Bulgarians have the option to set up on map or enter from the east, north of row T.
The German force has quite a mix of artillery pieces to support six 447 squads, a 548 assault engineer squad and eight SS 658 squads. Their German artillery consists of a Pak40 75mm AT gun, an 81mm mortar, two Flak30 guns and a Flak38 gun. They also have Italian guns; a 47mm AT gun and a short barrel 75mm ART gun. The garrison units use Italians weapons without captured use penalties. The Germans have no panzerfausts and cannot use Assault Fire. The garrison force and the SS force each have their own separate, but adjacent, setup areas. The Germans have an ELR of two; unusually, it applies to the SS units as well.
The partisan forces to the south are five 337 squads, one 127 HS, one LMG, one MMG and one light mortar. All the SW are of Italian manufacture. The Bulgarians have fifteen 347 squads, OBA of 70mm, a HMG and three LMG. They can set up north of row 24Y or the may enter along the east edge on or north of row 24T. The scenario card does not use “and/or”, so as written the Bulgarians must choose one or the other. I confirmed that this is correct The OBA is limited by SSR to row 24J or north.
The Allied side receive reinforcements in turns two, three and four. The first group is four 347 squads with a leader and LMG. The second group is three partisan squads with a leader and LMG. The fourth group are Soviets! They have two 628 squads, a leader, a LMG and two T34/M43 tanks.
The partisans have an ELR of five; the Soviets have an ELR of four and the Bulgarians have an ELR of three.
The victory conditions state that the Germans win by having more VP than the Allies. Both sides receive VP for CVP; the Germans receive double Exit VP for units the leave the map between 9R0 and 9Y1.
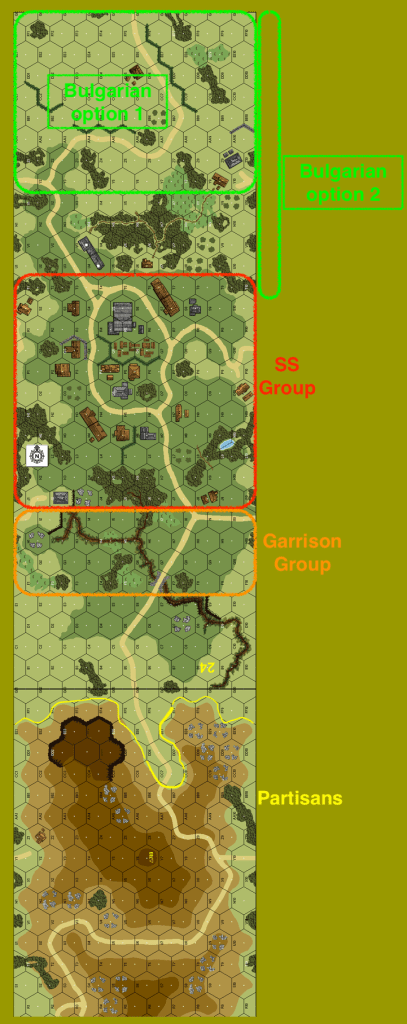
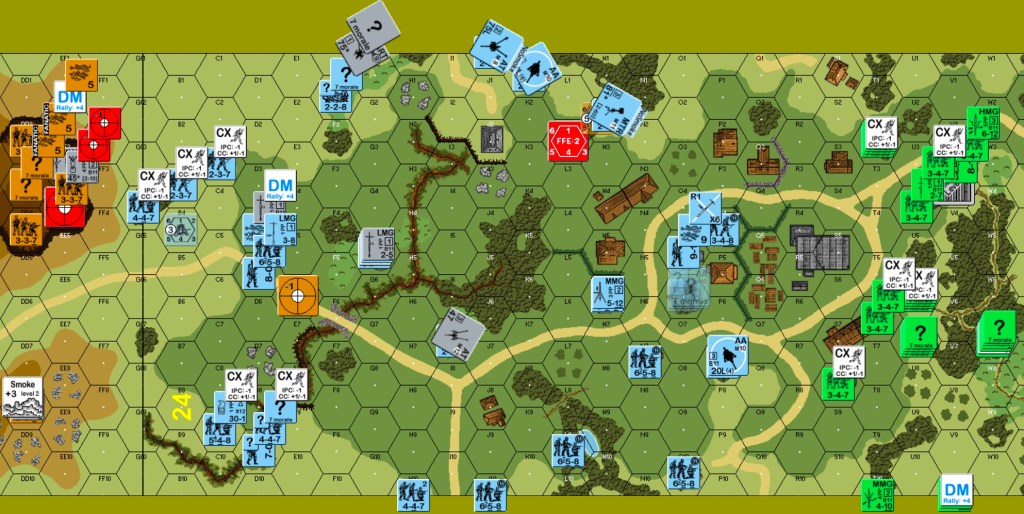
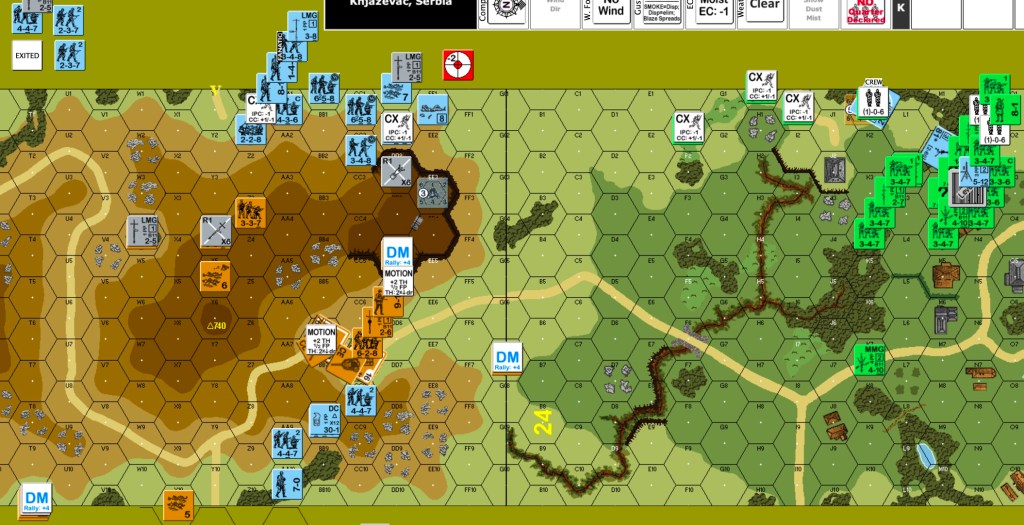
Here is the map.
This makes for quite a puzzle for the Germans. They need to inflict casualties. They need avoid becoming casualties or prisoners; there is no SSR to override the doubling of the value of prisoners. Lastly, they will probably need to exit some units. I played the German side in October of 2021.
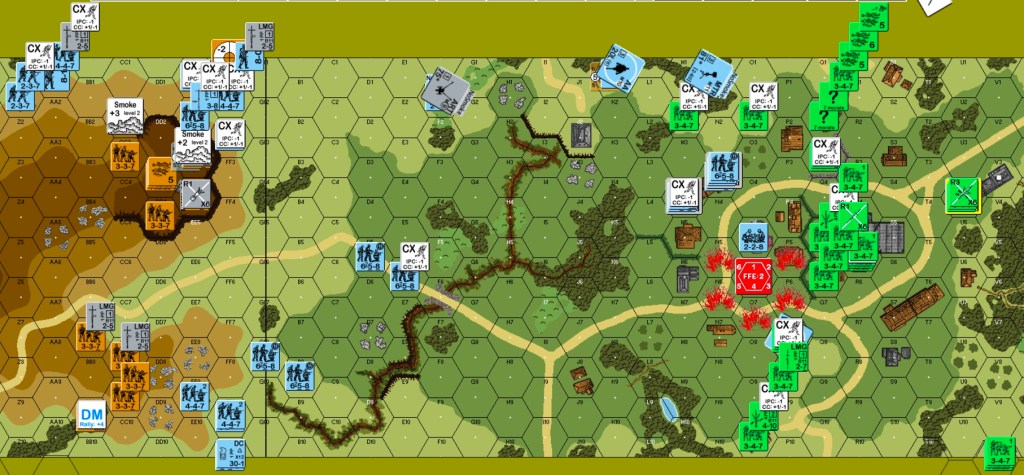
Here is my German setup.
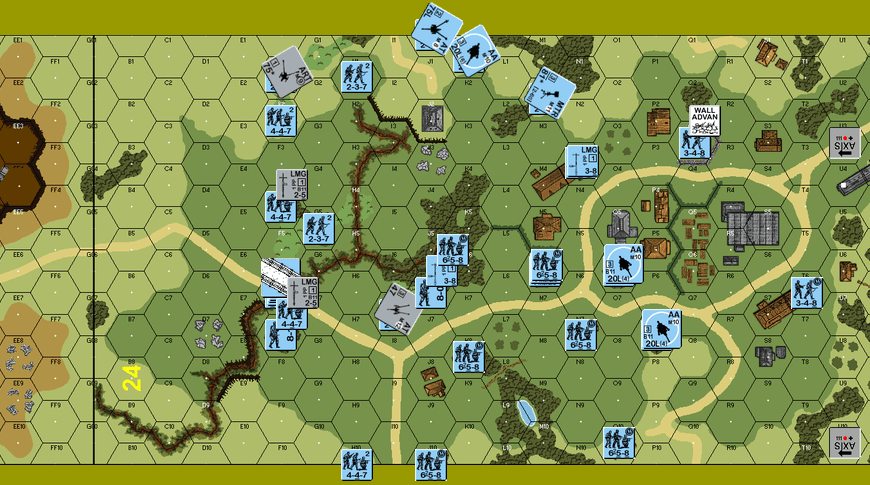
Under the bridge counter is the 548 with DC, a 447 and a 7-0 leader. Looking at the setup five years later, I ask myself why no AT gun is pointing to where the Soviet tanks will enter. The probable reason is that the Soviets do not enter until Allied turn four. I know the medium mortar is pointing at the partisan high ground to smoke it; perhaps the Pak40 75mm is the backup smoker. The CA of the flak gun in 24K1 has me puzzled because I believe it will need to fire north or east before anywhere else. I must assume the 47mm AT gun is also being prioritized to fire at partisans in high ground.
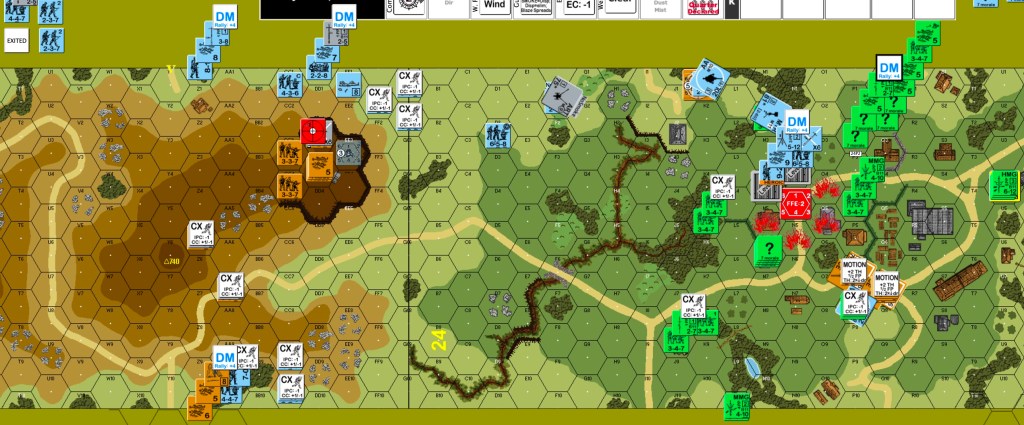
Here is the Allied setup.
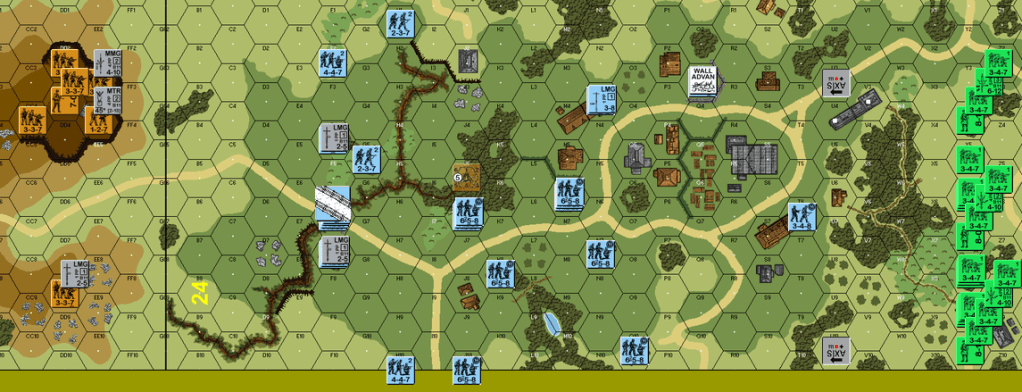
My opponent chose Bulgarian option one to set up everyone on board.
The game starts well for the Allies; partisan prep fire pinned a leader and broke a squad. Two Bulgarians squads move to the nearest German HS. It does its FF and SFF duty to leave residual and breaks one squad as well. Nonetheless, the green wave continues. Once it is safe, the Bulgarian HMG with and 8-1 leader moves to the tallest structure on the map: building 24V3. Of five squads exposed to defensive fire during movement, two broke. A few Bulgarian squads are in the valley. Sniper activity broke one SS squad.
German defensive fire mostly just places acquisition, however, it breaks the partisan mortar crew and causes BH for the partisan MMG squad. Being attacked at both ends already causes problems for the Germans; the HS adjacent to the Bulgarian squads cannot voluntarily break without surrendering. It is eliminated by two squads in CC.
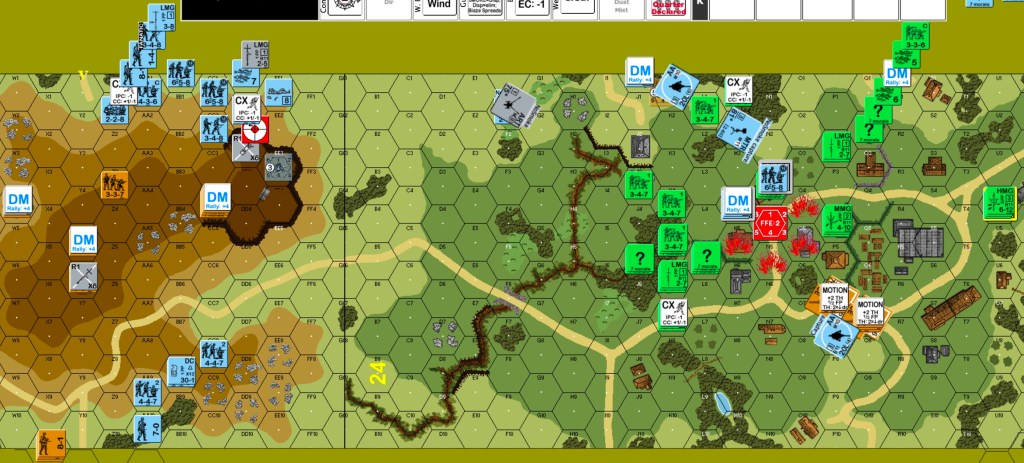
German prep fire tries for smoke from the medium mortar; none. Tried again from the Pak40; none. Tried from the Italian ART gun; smoked a partisan LMG position; other prep fire breaks the fanatic partisan MMG squad into two HS. The east flak gun comes on board and breaks a Bulgarian MMG squad. German units start moving to the rear. Partisan fire breaks a squad. The OBA module comes down on the medium mortar without affecting the crew. Here is the situation after one turn.
The Allies received Bulgarian reinforcements of four squads on turn two along the east edge of board 24. The Germans, however made it dangerous for them to take advantage of that. The units entered near hexrow T and joined the main Bulgarian group. The OBA eliminated the medium mortar crew. The partisans’ Italian light mortar malfunctioned. A lot of Bulgarian squads moved forward two or three hexes. A few were broken by the Germans. The HMG moved to a prime spot in the 24V3 building. The Germans’ Italian AT gun rolled snake-eyes on the infantry target type, had no effect on the target, fired again and rolled boxcars. Gotta love this game. The German sniper attacks the partisan rally hex 9DD3. It eliminated a broken fanatic HS and puts DM on two broken units. The Pak40 malfunctioned on its shot. After advances, the Bulgarians have reached hexrow Q.
The Pak40 left the game after its first repair roll; so did the Italian AT gun. The Germans smoked the partisan MMG hex with the one remaining smoke asset. Germans nearest to the Bulgarians fired to obtain a few Pin results. The southernmost Germans moved aggressively to take advantage of their one smoke. The Pak40 crew headed towards the medium mortar with a bonus of putting DM on a broken Bulgarian squad. The Bulgarian OBA moved to attack the Germans that hadn’t moved. The Germans were lucky; they did not suffer any ill effects. The Bulgarian HMG eliminated the flak gun crew in 24P7.

The partisan reinforcements entered during Allied turn three; they needed to enter on hex 9Y10. Besides those reinforcements, the broken partisan squad in that area self-rallied. The German crew recovered the medium mortar. The Bulgarian remained in the same location and again had no effect. The Bulgarian HMG broke, then eliminated the German crew manning the medium mortar. The partisan forces on the cliffs skulked. A sniper broke the German flak gun crew in hex 24K1. The central Bulgarian squads tried to go around the Germans blocking them. Two of five units broke. The rear Bulgarians had no trouble making the maximum forward moves.
A Bulgarian squad recovered the German medium mortar. The only German prep fire is to put another smoke near the partisans on the west side. Half squads drew the southern first defensive fire. A partisan squad fired and cowered. Surprisingly, the MMG team in the smoke managed to pin a moving stack. Several German units moved into building 24N3 to hold up the Bulgarians or die trying. The OBA stayed in place attacking only the flak gun. The Bulgarian HMG took a shot at exiting Germans and malfunctioned. German advancing fire broke two Bulgarian squads.
The Soviet reinforcements of two T34 and two 628 with LMG and leader set up to enter on Allied turn four from the north edge. The OBA attacked the building 24N3 and broke one of four units there and pinned one. The partisan MMG team broke one of the units adjacent to it. We misplayed the smoke in that hex; it should have been gone earlier. We fixed that which left some German units adjacent to partisan units for prep fire. Some broke. The partisans started to move further south to interdict the German exit. The Germans pinned one of those squads. The Bulgarians moved many units south, slightly inhibited by their own OBA. Only one squad became broken. The Soviets entered with the infantry as riders. They went all the way to the Bulgarian front line. German defensive fire eliminated one partisan HS in the east. The Italian ART gun rolled snakes to eliminate the partisan MMG team and the MMG. Advancing fire from the Bulgarians caused the 9-1 German leader to become a 9-2 heroic leader. A broken crew tried to rout through the FFE in open ground because it was adjacent to Good Order Bulgarians. The crew died. During the advance phase a Bulgarian HS advanced into building 24N3 and into the OBA. The OBA broke the unit.
German prep fire was very little; only a few units that had negligible chance of getting away. The first Germans to exit are two HS at the west edge that got by the partisans earlier. Other units near the west edge that tried to get by the partisans in the cliffs area had mixed results. Three German units near the east edge proceeded southerly carefully under fire from the partisans in the center of the mountains. Three other German units in the southern valley successfully ran out of the valley under fire. The Bulgarian OBA stayed put and broke another German in the 24N3 building. The Germans declared No Quarter to eliminate a broken Bulgarian squad in 24L0. At the end of turn four, the Germans have seven CVP and four(x2) EVP; the Allies have twelve CVP.
Both sides had a good rally phase; the Germans had a HOB give them a fanatic unit and a hero. The OBA stayed in place but did not hurt anyone. Some Bulgarians moved to attack the building 24N3 while others moved south through the valley in pursuit of the Germans. During German defensive fire they triggered a sniper that broke the flag gun crew in 24K1.
Next turn’s rally phase was dismal for the Germans. The partisans had a key rally of the the 8-1 leader at the west edge. German prep fire from the ART gun and the units in the 24N3 building. They did some damage. The German stack in 9Z0 with the new hero, being close to the exit area, took a shot at the nearest partisan hoping to help others exit. The partisan squad broke. Some Germans on the west edge, out of range to exit, elected to opportunity fire because of their CX status. Six German units moved closer to the exit area. The OBA pulled its fourth black chit in a row and stayed in the same location. This time it did some damage to the Germans in building 24N3. It eliminated the heroic 9-2 leader and broke the HS in the same location. That was the Allies only bright spot in that defensive fire phase. In advancing fire, the opportunity fire units unite with a moved 548 to make a decent attack on a partisan LMG team that broke it. The Allies now had 16 CVP to the Germans’ unchanged 15 VP.
The Allies canceled their OBA to have better shots at the building 24N3. It helped. Many Bulgarian units got into the building, putting upper level encirclement upon the remaining Germans. The partisans on the west edge attempted to get closer to the action; defensive fire broke the stack. The first T34 moved quickly south using the road. Defensive fire knocked the rider off the T34. The second T34 followed close behind. The Bulgarians took the 24N3 building, capturing 1.5 squad equivalents. They also captured a crew from 24J0. In close combat, the Bulgarians eliminated another crew, but lost a HS. At the end of Allied turn six, they had 18 CVP plus prisoners worth double CVP (another ten VP) and three captured guns (another 6 VP doubled); total 40 VP. The Germans could theoretically exit fourteen more VP(x2) to give a total of 43 VP, but the Soviet tanks and partisans would probably eliminate or capture the west edge Germans for more CVP. I decided to concede.
I believe I made a mistake by leaving any stay-behind units, forgetting that they could be taken as prisoners for double value. There is still the capturing of guns to think about. Our match was skewed a bit by having less smoke than I should have, and by losing two guns to malfunction early in the game. An interesting variation might be to set all the German units up for running south at the very start. I enjoyed this scenario in particular because it felt unique for its combination of units.
Discover more from Low Ammo
Subscribe to get the latest posts sent to your email.

Nice work Micheal
??????? ________________________________
LikeLiked by 1 person
Nice AAR ! Thanks
LikeLiked by 1 person