
My opponent chose this Lone Canuck offering, designed by George Kelln, but I liked it as soon as I saw it. Any scenario featuring Canadians attracts my eye. This scenario also has the challenge of major tank-on-tank action in addition to the infantry battle.
It is December 6, 1943 in muddy Italy. Three Canadian units have tried to create a bridgehead across the Moro River, but only the Princess Patricia’s Canadian Light Infantry have been successful. The scenario captures the action when the Germans attack to eliminate the bridgehead and Canadian tanks come to the rescue.
The objective of the Germans is to clear the north side of the river (within five hexes of 40Q1) of Good Order Canadian infantry and any mobile Shermans with functioning MA, while avoiding a CVP cap of 35. They have seven turns to accomplish their mission.
The weather is overcast, grain is vineyards and orchards are olive groves. Vineyards are inherent terrain and bog terrain; they have the same movement cost as brush. Olive groves have a TEM of +1 and double the movement cost of an orchard; they are never out-of-season. In my Ortona module research, I learned why: olive trees keep their leaves all year round. The river is on the map (boards 17 and 40 with four overlays). It is flooded. It has a ford as the only location that the Sherman tanks can use to cross the river. An SSR specifies Soft Ground adding one MP for vehicles per non-road hexside unless entering a building / rubble / woods obstacle.
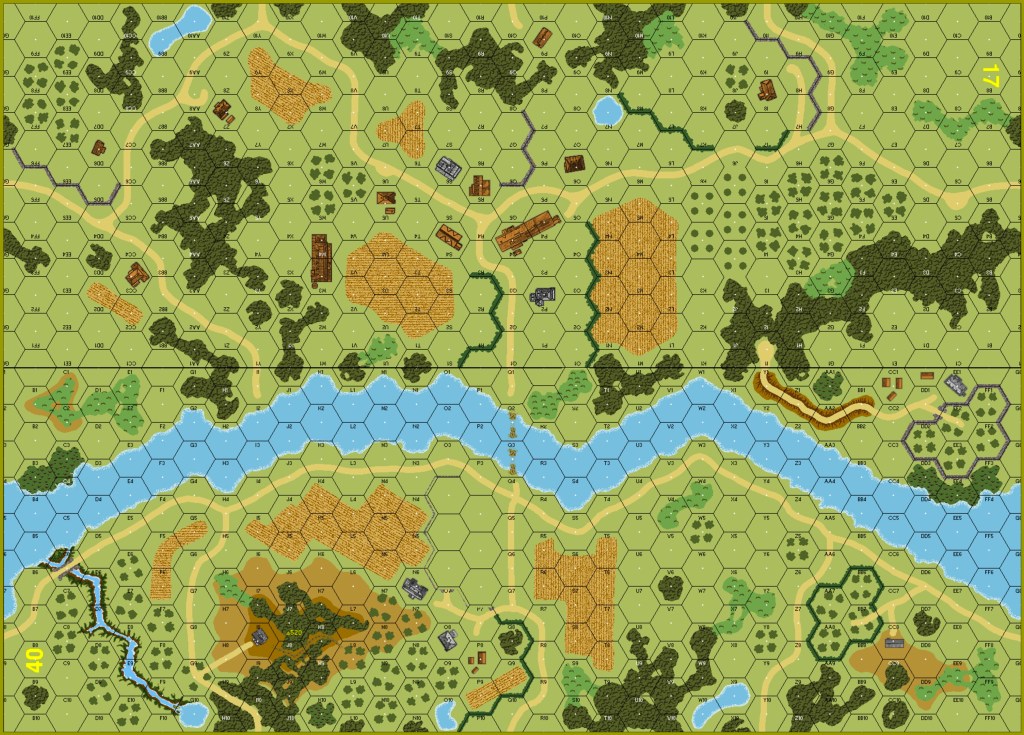
I like the armour match-up in this scenario. The Canadians have Sherman II tanks that have a front hull AF of eleven and a front turret AF of eight. The Germans have a mix of Panzer IVF2 and H models. They both have front turret AF of six. Their front hulls have AF of six and eight respectively. The Sherman has the less powerful 75mm gun with a penetration of 14, while the Panzers have the 75L gun with a penetration of 17; APCR will give the 75L a penetration of 20 before range modification. The Shermans must use red TH numbers. It is an interesting match-up of the work horses of both armies. The map image above shows the orchard hexes as in-season, but all the later images show them out-of-season. Don’t tell VASL that it is December when you need olive groves. We remembered to play them as in-season.
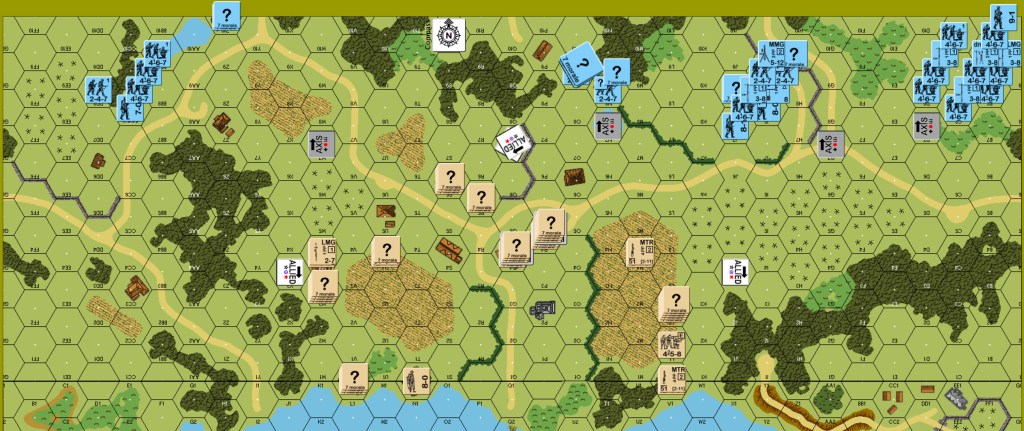
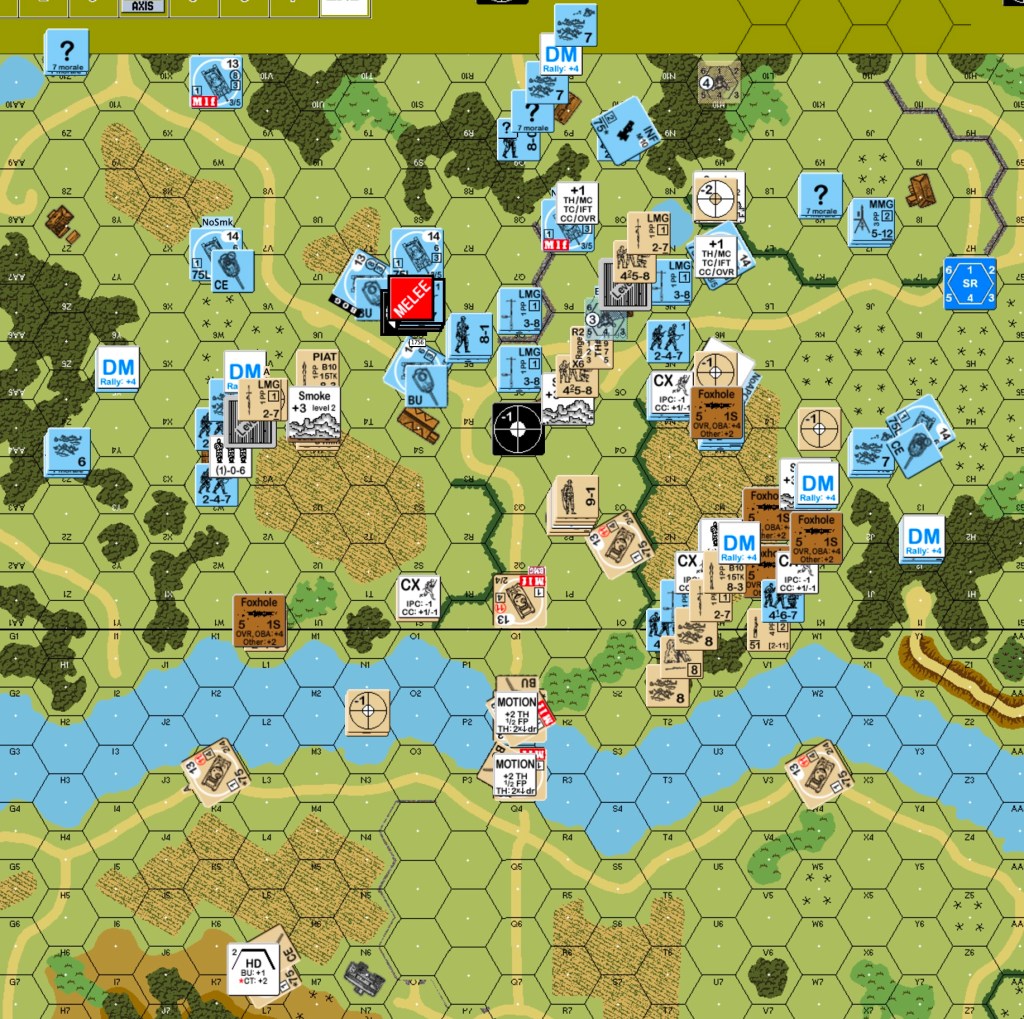
The Canadian bridgehead has twelve 4-5-8 squads with four decent leaders, four LMG, four(!) 51mm mortars and three PIATs. They also have eight dummy counters and six foxholes. They set up north of the river no more than seven hexes away from 40Q1.
Part of the German force sets up on board: twelve 4-6-7 squads with four leaders, four LMG, two MMG, eight dummy counters and a 75mm INF gun. They also have an 81mm OBA battalion mortar module with HE and Smoke. The gun cannot be emplaced, but may be concealed. For most of the game, I forgot that the Germans could use panzerfausts in December of 1943; the range is one hex.
On Canadian turn two, eight Sherman tanks arrive from the south with an armour leader. Right after that on German turn three, nine Panzer IV tanks arrive from the north edge with seven 4-6-7 squads, two LMG and two leaders.
I had the attacking Germans. Here is my opponent’s Canadian setup.

Being only an average player, I had no brilliant plan as the German attacker. I could see that I needed to have Germans both east and west of the Canadians to hopefully cause rout difficulties. The Shermans come on before the Panzers so I would be trying to put them where the could attack or smoke the Canadian infantry, and interfere with their rout paths, without being fired upon by the Shermans. I would also position some to deter the Shermans from crossing the Moro. I decided to send a lot of my “at start” infantry through the east olive groves. Unusually for the attacker, the Germans have some dummy counters. I used them as sniper bait.
German turn one was spent approaching the Canadians for the most part. I started the OBA. The first Canadian mortar malfunction occurred; there would be more. The most significant thing that happened during Canadian turn one was the German radio malfunctioning.
The Germans moved closer in their turn two, using non-OG as much as possible.
Canadian turn two saw the eight Shermans enter, with five taking the center road heading for the ford. The Canadians broke two more mortars. Both sides broke units of the opposing side in their respective fire phases. The ford is like a deep stream, so the Shermans pay 2+COT in each ford hex. COT is 2, however, because of the Soft Ground SSR. A sniper attack broke the German gun crew.
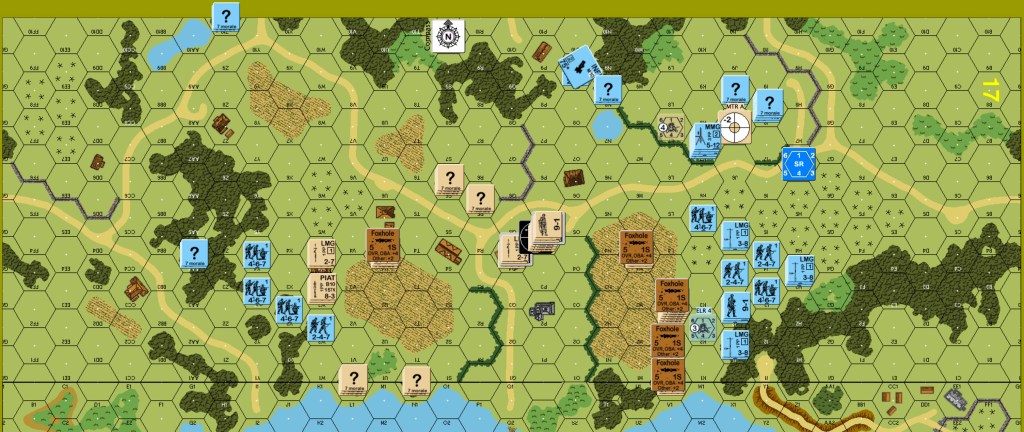
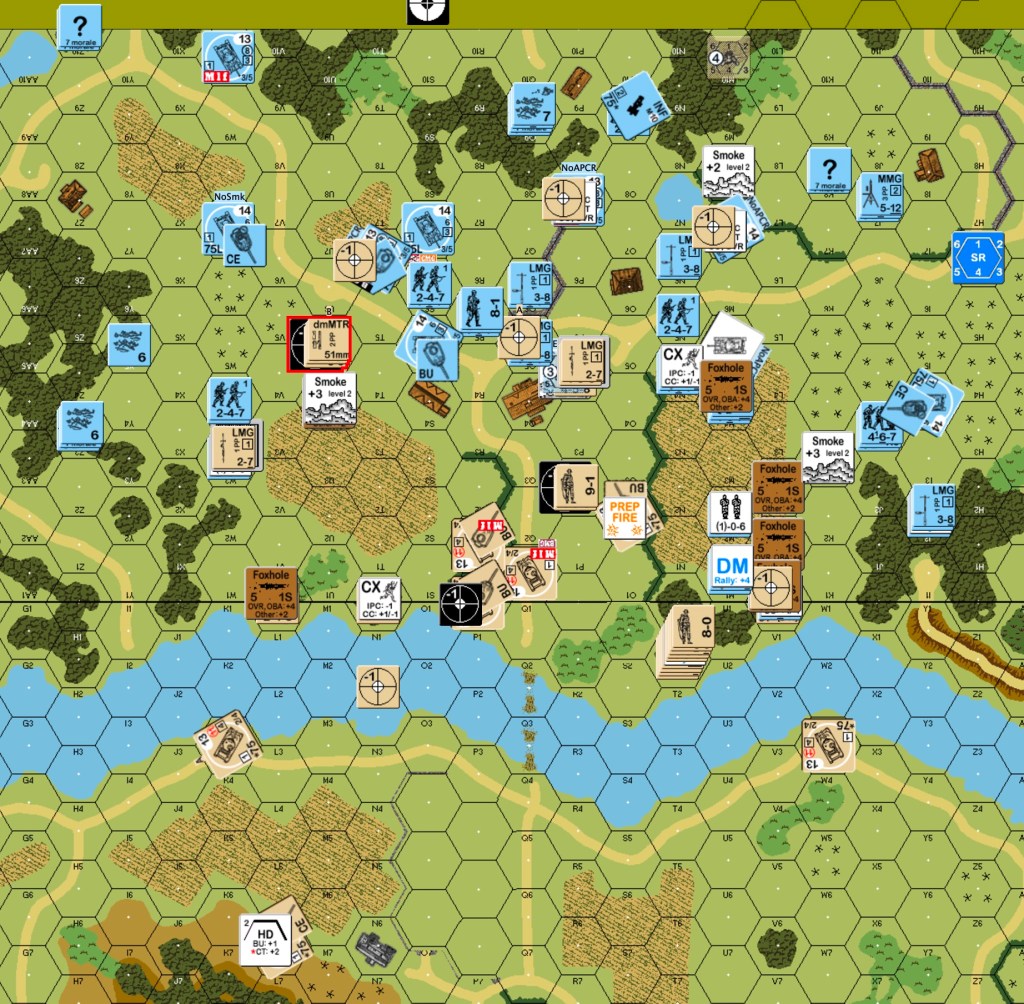
I set up the German reinforcements to bring all their infantry into the middle with one tank. The rest of the tanks set up split on the two flanks. The Canadians repaired one of the broken mortars, six’ed out another, and rolled a twelve for a rally attempt on a leader, followed by a six to die; ouch. The only German Prep fire broke a Canadian leader and squad in the east. Two tanks went to a hedge line to cover the ford exit and target a Canadian building. Two tanks entered further east from that to assist the infantry there. Four tanks came in on the west side. One tank parked at the north board edge to discourage a Sherman from moving up to a level two position on the south side of the river. The German infantry progressed on all fronts with only two broken units to defensive fire. A HS took over the INF gun. The Sherman tanks had some dreadful luck, breaking two MA. The Canadians lost a HS in the rout phase.

In Canadian three, they six’ed out another broken mortar and failed to repair either Sherman’s MA. The German radio stayed malfunctioned. The Canadians have no skulk option in this situation, so they did a lot of prep fire. They broke two German squads and reduced one of them. Their sniper also broke a MMG team. Two Shermans carefully exited the river such that they each challenged only one German tank. One Panzer fire and missed. The other, already in motion, did a motion attempt to change its VCA for a safe escape. Several more entered the river. A Sherman took a level one HD position south of the river. A Panzer fired at it to no effect. German defensive fire in the east broke a squad but triggered a sniper that put a small stun on a CE Panzer. Tank fire broke a squad in the central building which triggered the Canadian sniper again and put a small stun on a second CE Panzer. The SAN was four. The Canadian sniper moved a fourth time to DM the still broken gun crew. On the fifth sniper occurrence of this turn, the sniper eliminated that crew. The two northern most Canadian squads survived a lot of fire, some of it point-blank. Another Sherman, the third one, broke its MA during advancing fire. In the west, a Canadian squad surrenders. In the east, the broken leader and two squads rout to the woods at the river. This is a potential death trap if the Germans can get and keep good order units adjacent.

Lots of repairing to do in German four; three Shermans and a PIAT for the Canadians; one radio and one gun for the Germans. Only the gun comes back. Most of the brokies stay broke on both sides. The Germans prep three Pz4 for smoke and break a MA of a fourth. A Pz4 tried to kill a Sherman behind the center-east hedge. No APCR. It hit the hull, but didn’t penetrate. I felt the return shot would be fatal so the Pz4 used IF and hit the hull again, and failed to penetrate again. Another Pz4 fired at a squad in an adjacent building. MG attack of 16 rolled a twelve. Random selection broke both MG. MA attack somehow misses the target. I intensive fired and missed again. The eastern Germans tried their best to get adjacent to the Canadians in the woods near the river. Four and a half squads tried, two and a half made it. The northern Germans, led by a berserker, moved closer to the northern buildings. The western Germans closed in on a smoked-in half squad. The Sherman that survived two hits fired back and destroyed the Pz4. A Sherman on the south bank saved the smoked-in HS by breaking both attacking German units. Advancing fire broke only one Canadian squad in the central building; none in the northern buildings. Another Pz4 broke its MA firing at a Sherman. A German squad advances adjacent to the broke pile of Canadian units in the woods against the river. I crossed my fingers and hoped that the Canadian leader would not rally. Both northern buildings underwent CC attacks from 1.5 squads each. An 8-1 leader helped in one. In the CC without a leader, the Germans ambushed the Canadian squad and CR’d it. The leader-led Germans were successful in taking their building, which also returned the berserker to normal.
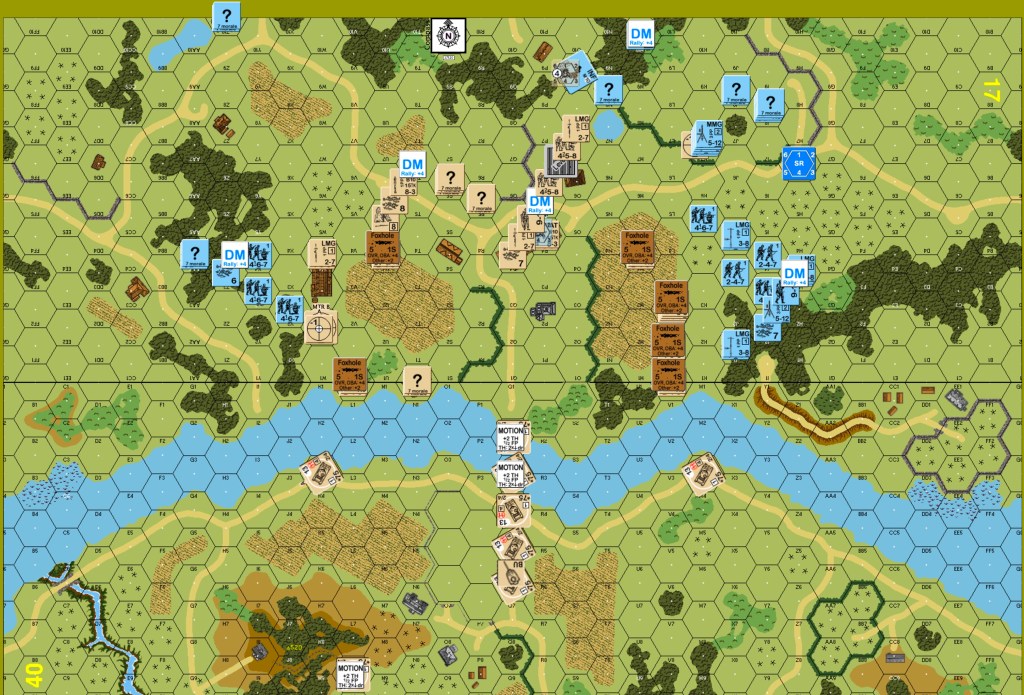
In Canadian four, one Sherman MA repaired and one MA disabled for recall. In the all important woods hex with the broken Canadians, the leader did not rally, but the DM squad rolled snake-eyes for the self rally and created an 8-0 leader. That leader rallied the other DM squad. Damn! No other Canadian units rallied, but those were key. No Pz4 tried to repair their MA. The OBA observer chose rallying a unit over trying to repair the radio. Three Shermans prep fired to no effect. In the woods near the bank, however, the newly rallied troops broke the adjacent German unit. Two Shermans moved out of the river onto the north bank. More Canadian broken units rout back to the woods near the hedge and the river.
In German five, one Sherman repaired its MA. A Pz4 destroyed one Sherman on the north bank. German infantry approached the center building and in the west, building U5. They lost one squad to a KIA. One Pz4 took a HD position to challenge a south bank Sherman. The Canadian infantry in the smoked central building rolled low enough to get a result, but the adjacent German stack passes all its MC. The attack triggered the German sniper, however, which broke one of the two HS remaining on the west side. A CC in the central building goes to the Germans, as does the CC in the west building U5.

The Germans bring back some troops in the rally phase; the Canadians do not. The HD Sherman on the south bank took on the HD Pz4 and shocks it on an IF shot. Some of the infantry in the woods redoubt dug a foxhole for better protection. A Sherman with a malfunctioned MA moves adjacent to German infantry in the central building, but is shocked by a Pz4. A Pz4 hits a Sherman in the side hull and manages to kill it. The last Canadian squad in the central building advanced downstairs for CC. The Germans turn it into a HS and a melee follows.

The Germans rallied a lot of troops in German six, and the shocked Pz4 recovered. The Canadians rallied their infantry, but the shocked Sherman stayed shocked. We also had rain start, but most of the shooting was at less than seven hex range. The Germans had only two turns left, so the CVP cap is ignored in their quest for victory. The HD Pz4 made a turret hit on the HD Sherman and then killed it. A Pz4 with no MA moved to lock the fire of the Canadians in the P2 stone building. A lot of German movement brings them closer to all the remaining Canadian units. Defensive fire broke two and a half squad equivalents. The western attack was substantially weakened. Advancing fire gave the Germans nothing. Three squads, two LMG and a hero advanced next to the woods redoubt and crossed their fingers. The Germans started three CC, two of them against Shermans. They roll a twelve against one Sherman which causes casualty reduction to ALL the attackers (no random selection); a leader and a squad. The leader died of his wound giving a +1 MC to the surviving HS, which failed the LLMC. The Germans won the CC in the central building, but the P2 stone building CC goes to melee. The CC against the shocked Sherman eliminates it.

The Canadian prep fire from the woods redoubt is stupid good and it broke all three adjacent German squads. The Sherman whose fire is locked by a broken HS started to move. I finally remembered that I could use panzerfausts. A squad adjacent to that Sherman got one and burned the Sherman. Two Shermans in the river came onto dry land; only one had a working MA. A Pz4 fired twice at the other and missed. They move to support the woods redoubt. The one-to-one melee in the P2 stone building continues.

The German rally phase in their seven was disappointing because the two broken squads nearest the Canadian woods redoubt failed to rally. The only German prep fire is a Pz4 shot at the Sherman with a working MA. It succeeded in eliminating that Sherman with a turret hit. In the west, a Pz4 bounding fired at the Canadian stack, broke two of three units, and then moved into the hex and bogged. The remaining German infantry in that are moved adjacent to the Canadians. A Pz4 moved into bypass of the woods redoubt, survived a PIAT shot, but went down to a CCRF attack. Another Pz4 moved adjacent to the woods redoubt. Another Pz4 went west to support that attack. The remainder closed in on the woods redoubt. Two squads and one leader tried to get adjacent, but only one squad made it. Advancing fire finished off the western Canadian stack. Much advancing fire against the woods redoubt obtained only a broken wounded leader. The hex still contained a heroic leader and two and a half squads. A German hero and squad entered that hex for CC. The Canadians ambushed and eliminated them for no German gain.
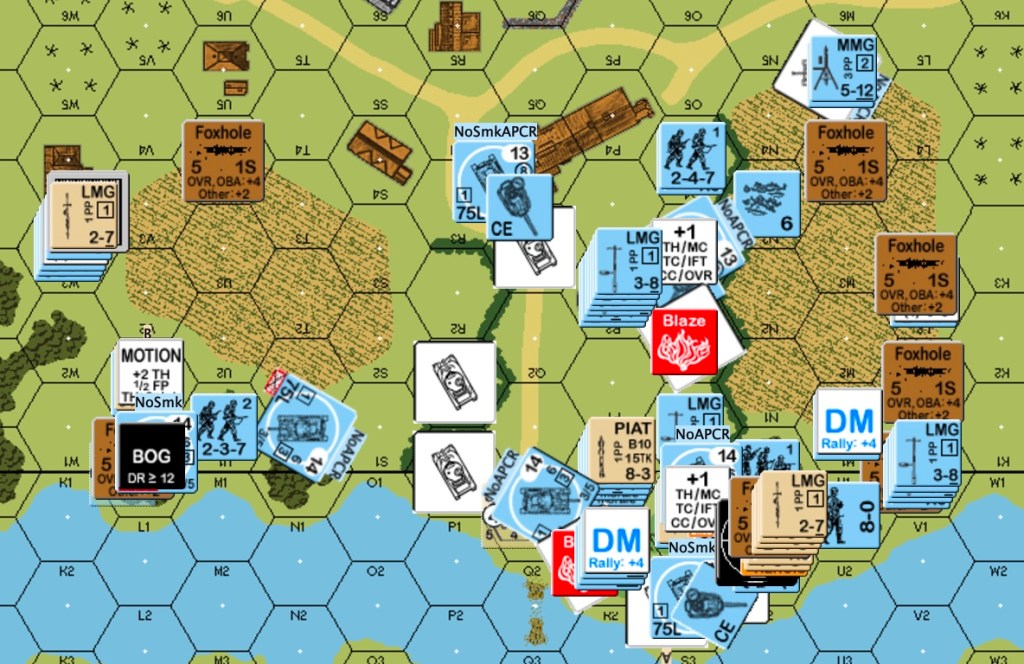
The Germans can only hope for the best with their defensive fire attacks at this point. The Canadian prep fire only pins an adjacent German squad. One Canadian squad assault moves out of the redoubt hex for infantry overrun against a German 8-0. The squad survives fire from the pinned adjacent German squad and then eliminates the German leader. Follow up defensive fire doesn’t break any Canadian units, so the the game ends in a Canadian victory. A leader and two and a half squads remain in good order for the Canadians on the north bank in the woods redoubt which is in the victory area.
I enjoyed playing the Germans in this scenario. I’m willing to try the Canadians, but I believe they have the tougher job. The amount of weapon breakage in this match was unreal, and probably hurt both sides about the same; remember that the Germans lost their OBA because of breakdown.
Discover more from Low Ammo
Subscribe to get the latest posts sent to your email.

This looks like a swirling mess of a fight – which are the BEST ASL scenarios!! Thanks for the writeup.
LikeLiked by 1 person
That is a scenario with a lot going on!
LikeLike