
This scenario (from Rally Point) has several attractions for me. It has Canadians. It is short; ideal to fill out a session when a regular size scenario ends early. It has Canadian paratroopers, a seldom seen species in ASL. There was only one Canadian Parachute battalion of just over 600 soldiers (all ranks). It always operated with the British 6th Airborne Division. As an aside, these were the only Canadians involved in the Battle Of The Bulge.
Shortly after D-Day, units of Company C, First Canadian Parachute Battalion, are tasked with finding some troublesome mortars. The scenario has unique VC and SSR to simulate a reconnaissance patrol situation. The Canadians need ten VP to win and they have a CVP cap of five. They earn points in two ways. First, there are six specified hexes in the German backfield that the Canadians can run through to earn one point for each hex. Second, there are two 81mm mortars with crews in the German OB. If the Canadians force a crew and mortar to lose HIP, they receive four VP. The Canadians have five turns to achieve their victory conditions.
I contacted Evan Sherry, the scenario designer, about the HIP mortars and crews. There is nothing in the SSR, nor the setup instructions, to force the Germans to emplace the mortars and HIP them. He stated that if the German player did not HIP the mortars and crews, then the Canadians automatically receive eight VP. I was curious about Canadian prisoners counting for double; he stated that they are.
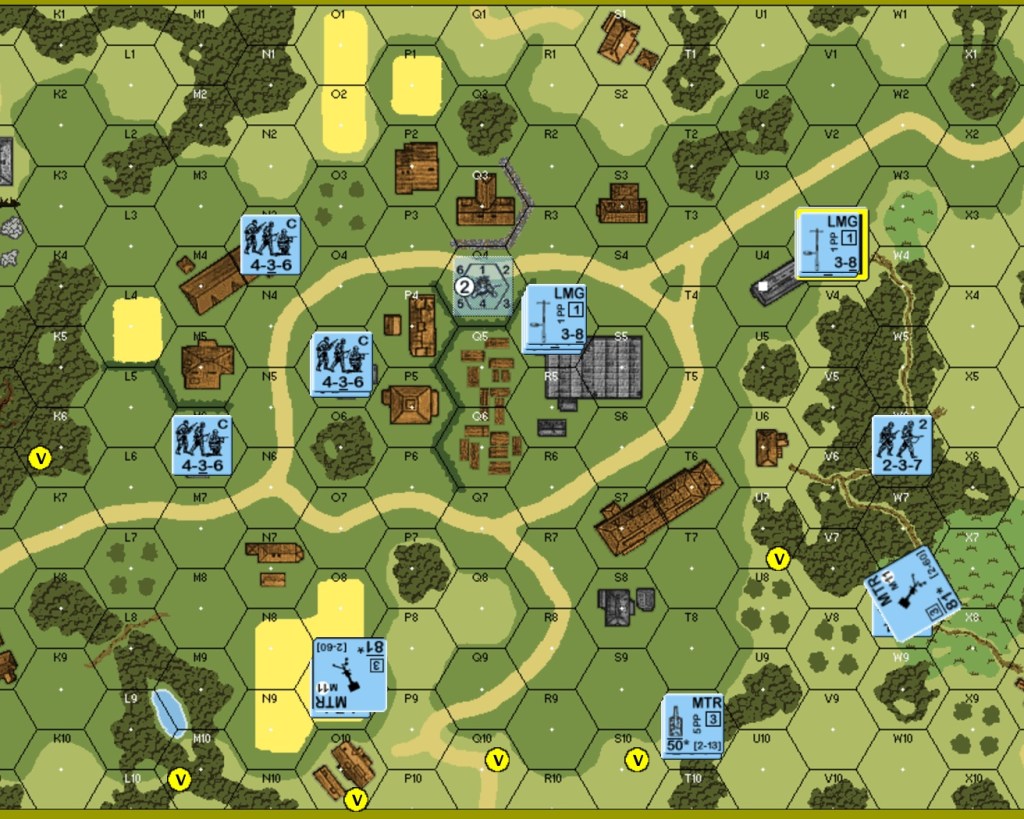
The action takes place on board 24, representing the town of Bavent, France.
The German order-of-battle, aside from the two 81mm mortars with 127 crews, has three 447 squads, three 436 squads, two LMG, one 50mm mortar and two leaders. Their setup instructions keep them in a box framed around the buildings, with the two 81mm mortar teams in a smaller box behind the other German units. The following image shows the map with the German setup areas.

I played the German side. I’m not one to ignore the obvious, so for sure a squad with LMG is going in hex V2, level two. I placed the other LMG team with a leader in hex R4 to cover the S4 to X1 hexrow. Someone needs to be on the right flank in the woods. On the left flank, I stay out of the woods. I put troops in the buildings to have some open ground in front of them. The unit in N3 would have been more effective in the level one location. I deployed one squad. One HS will man the mortar in a level zero hex (i.e.; not in the valley) to cover some of the Canadian entry hexes. I see I set it up in an illegal hex; had I noticed, I would have put it in U5 and probably dropped it early in the game.
If I was to set up the Germans again, I would leave a squad high in hex V2, but the LMG would be in hex M6 to cover the west road.
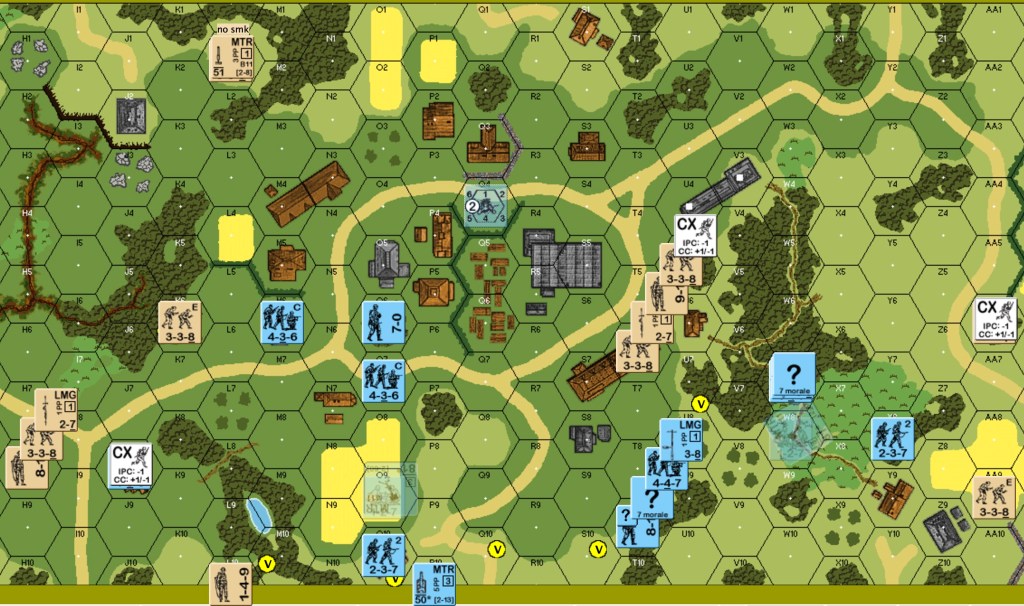
The Canadian units are very small in number: three 648 squads, two leaders and two heroes. They are carrying two LMG and one light mortar. The heroes are really just scouts with one firepower and no ability to influence other units by SSR. They can’t use any SW, either. I would have been tempted to deploy every squad before entry, but my opponent chose to deploy two squads. His approach was wide, avoiding the middle except for one HS with the mortar, which was broken by the German mortar team. On the Canadian left, a hero-scout was wounded.

The Germans shuffled troops around to respond, except for the high unit, which prep fired ineffectively, and was then broken by return fire. The right flank was more important to me than the right center, because of the HIP mortar team there. This caused me to leave the center-right open. A Canadian stack moved into that opening. A hero-scout on the German left waltzed past ineffective defensive fire to end up adjacent to a victory hex. German turn two saw some ineffective prep firing and more repositioning. The Canadians conducted some recon by fire, looking for the HIP mortar teams.
The Canadians got hurt bad on the German left in their turn three. One HS died dashing across a road, and a second broke moving through open ground; at least the accompanying leader stayed good order. That broken unit could only rout to a woods hex that would stay under German fire. The Canadians claimed three VP hexes and walked through various terrain looking for the HIP mortar teams. The Canadians initiated two CC. One HS died to a German squad. One hero-scout caused a melee with a German HS. The Canadians had 3 VP and they lost 2 CVP. German turn three had mostly moving Germans and a small amount of ineffective fire by both sides.
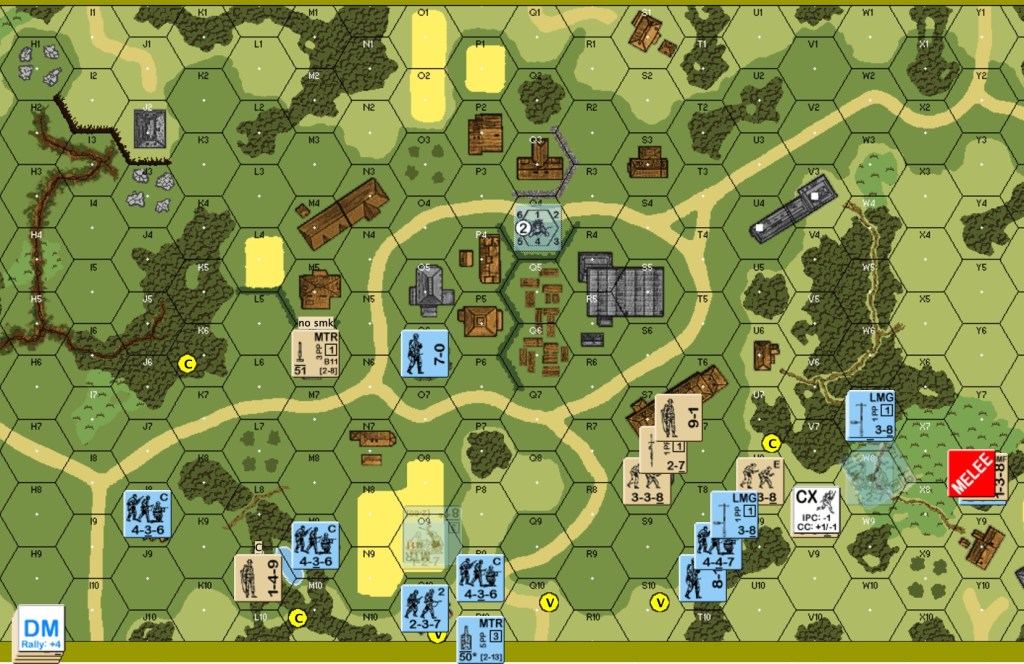
The Canadian player pushed hard in his turn four. He found the HIP mortar team on the German left, but he lost two HS broken, and then captured for double points. That meant even if the Canadians could achieve 10 VP, they would be over the CVP cap at game end.
It was an intense, fun affair while it lasted. I enjoyed it. I recommend it for when only a couple of hours are available for an ASL fix.
Discover more from Low Ammo
Subscribe to get the latest posts sent to your email.
