
NOTE: Two days after making the post, I learned that we played with east and west reversed. I believe this is still a fun scenario, but a correct playing would certainly begin quite differently.
I thought this scenario really deserved a write-up because of its uniqueness. This scenario is an early war design by the late Ian Daglish. As an aside, I was fortunate to correspond with Ian in 2004. During one of the years that I ran the Montréal ASL Festival, Ian asked me if I would try out two “fog of war” scenarios for him. I did. Ian had designed the scenarios to be presented as “one side only” to the players. The scenarios were interesting and people enjoyed them.
This scenario appeared in ASL Journal 4, which also had an article on carriers by Ian. Carriers are a part of what makes this scenario unique. The setting is 1940 Belgium. The British force of three Mark 6B tankettes and six Universal carriers set up on board and are screening the move of other troops. Big surprise, a mobile German force catches up to them. That force has ten squads on motorcycles and sidecars, two Kfz 13 lightly armored “bathtubs” and an unarmed Kubelwagon towing a Pak 36 anti-tank gun. On turn three, they receive reinforcements of two PSW 221 armoured cars that can spend only half of their normal MP on entry.
The Germans can win by two methods. They can exit 16 VP (prisoners NA for exit) on the far edge from where they enter, or the can inflict 23 CVP. Besides the British OB working against them, the British can exit off the west edge without being considered as eliminated. The Germans enter from off the east edge.
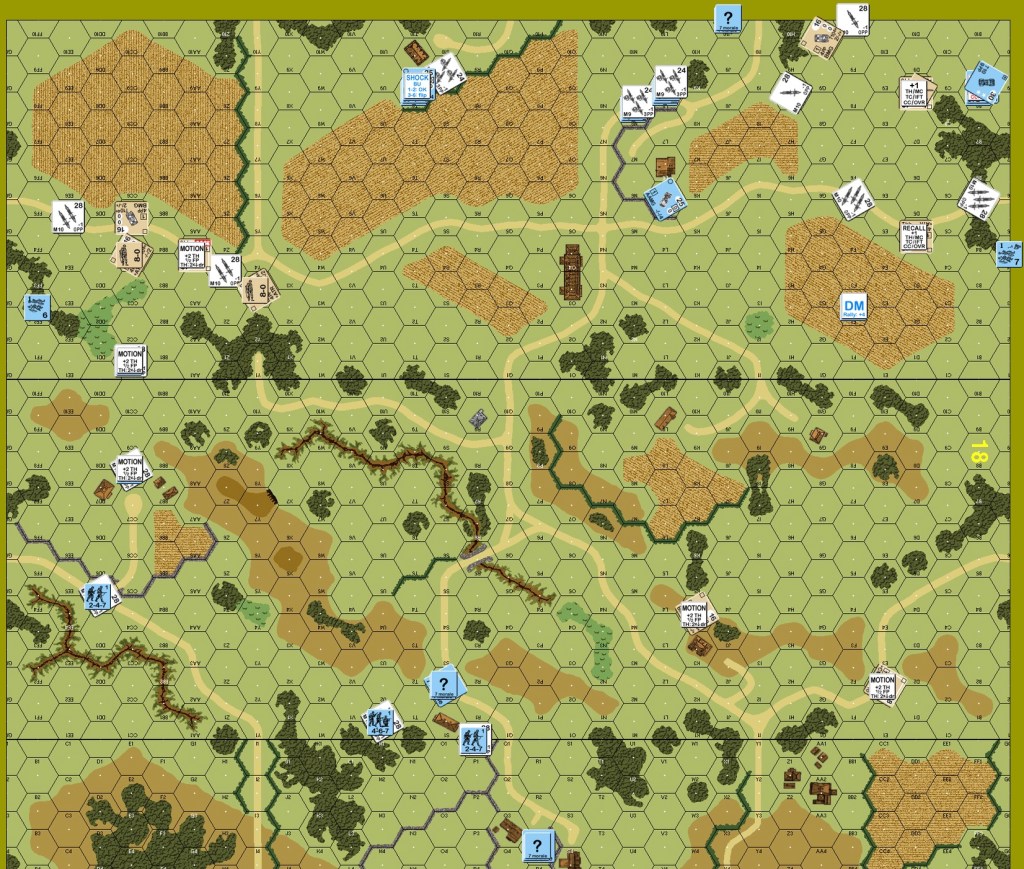
Here is the battlefield. The Germans enter from the top.

As the British, my priority was to set up to cover the road entry hexes with weapons that would leave residual firepower on the hex. I placed the three tankettes in level one and level two hexes to accomplish that. The carriers setup up either on level one to shoot over any brush or on level zero to cover open ground areas. All units started concealed even though they would lose it quickly, just to keep the Germans in the dark during their setup.

The German player entered most of his troops on his left with a small flanking force on his right. Although everyone was on motorcycles, the first units to enter were half squad riders. I waited to fire until there were more valuable targets or it was obvious there was nothing else coming. I had an assortment of hits and misses and sadly malfunctioned the MA of a tankette. The Germans built up a fire bases behind hedges.
The British have a big decision to make on their turn one. Do they stand and fire or attack with overruns and BFF. Since every unit was a vehicle, I think skulking was not an option, although I could have repositioned to be out of sight until the next turn. I chose to attack. I did some overruns, some BFF and some moves just to cause DM. I eliminated a HS and an 8-1 leader. The Germans put a stun on one carrier. I made an error by leaving the center road uncovered.

During the next German turn, my right side units took a beating (including a second stun on a carrier to recall it) and were unable to prevent some motorcycle units from high-tailing it down the center road. The anti-tank gun unhooked where it was and survived the defensive fire. Some of the German flankers were able to penetrate the screen I had there.
The next turn went similarly, but I never again left the center road uncovered. I sacrificed one carrier to the AT gun to save a tankette that was in danger. During German turn three, their central fire base remounted their sidecars and moved partway down the center. One of the reinforcing armoured cars went down the center road; the other held back to protect the left-behind German assets. I had a second tankette malfunction its MA. One of the two repaired the MA a turn later. After three turns, the Germans and the British were all over the map, something one doesn’t see all the time.
The Germans exited two squad equivalents on turn four. The Kubelwagon hooked up the PaK 36 and headed towards the center road. A carrier ATR shocked an armoured car. The British repaired one broken MA on a tankette, allowing them to threaten the towed PaK 36. A tankette just missed eliminating a Kfz 13.

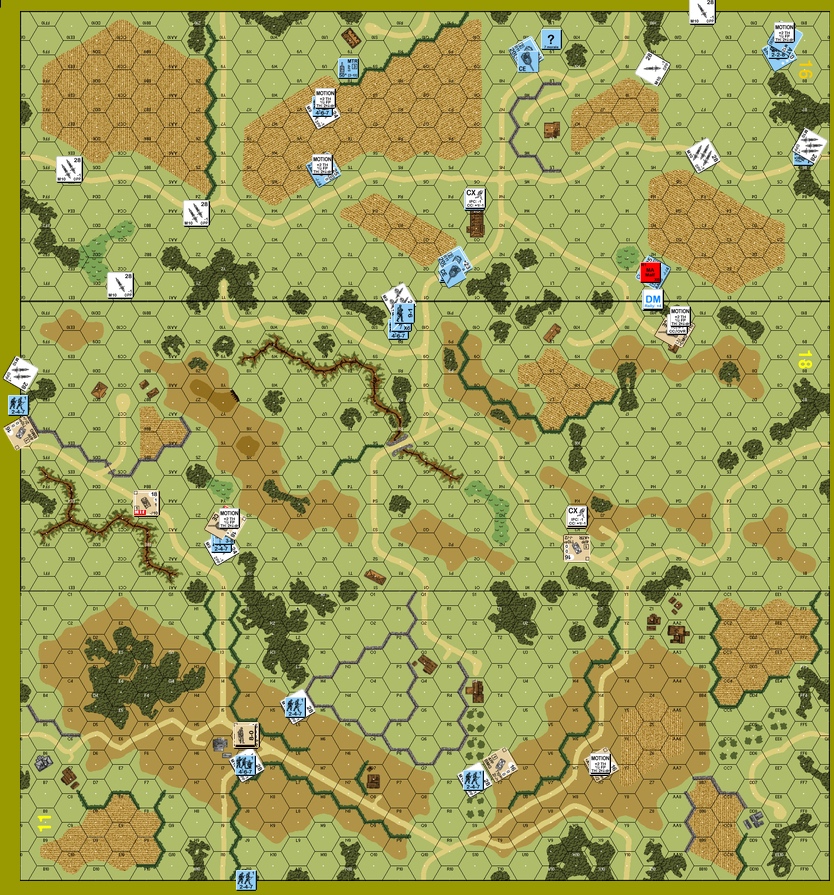
The shocked armoured car went to UK then to eliminated. A tankette caught up to the towed AT gun and eliminated it. I sent a leader to tie up a broken unit in CC so it wouldn’t self-rally. Three German vehicles bunched up along the center road near the board edge. Two of them malfunctioned their MA trying to protect themselves. As they went to exit on their sixth turn, the British destroyed two of them to make the win by exit impossible. The Germans did not have enough assets to win by eliminating British units either. Here it the situation at the time of concession. The Germans had exited only four VP of infantry.

I think it was a mistake to send a flanking force against this British setup. A better use of HS on motorcycles might have been to overwhelm one side of the defence in concert with all the other units. Maybe then the AT gun could have unhooked on turn one to threaten the British. I recommend the scenario.
Discover more from Low Ammo
Subscribe to get the latest posts sent to your email.

Fun little scenario. I will have to play that one!
LikeLike
One of the not so often seen, highly mobile on both sides type of scenario! I love it. I have yet to realise the power of carriers, really. I’d love to try more carrier scenarios. Thanks for the writeup!
LikeLike